This guide explains how to create and modify a task group. It is intended for general users.
Task groups enable you to build templates for your standardized operations (i.e. tasks that must always be completed for each sale, order, product, or process). For an example of how this can help your team, read our feature highlight.
A task group is a 'checklist' of actions that must be done. For example, these could be production actions (e.g. gathering materials, preparing work spaces, assembling products) or a standardized sales process (e.g. initial phone call, follow-up email, send product sample).
You organize the task group using various line item codes (LICs), then link the checklist to another record (i.e. an assembly LIC or a template). When that record is used on a new lead or sales order, aACE automatically generates jobs and schedules each of the tasks. Once the first task is completed, aACE automatically updates the job's status to that task.

As you begin organizing standardized processes into task groups, we recommend that you over-estimate the timeframes needed (i.e. Start On and End On fields). As your team consistently completes tasks on schedule, you can refine the estimated amounts accordingly.
Creating a New Task Group
- Navigate from Main Menu > Order Setup > Task Groups.
- Click New.
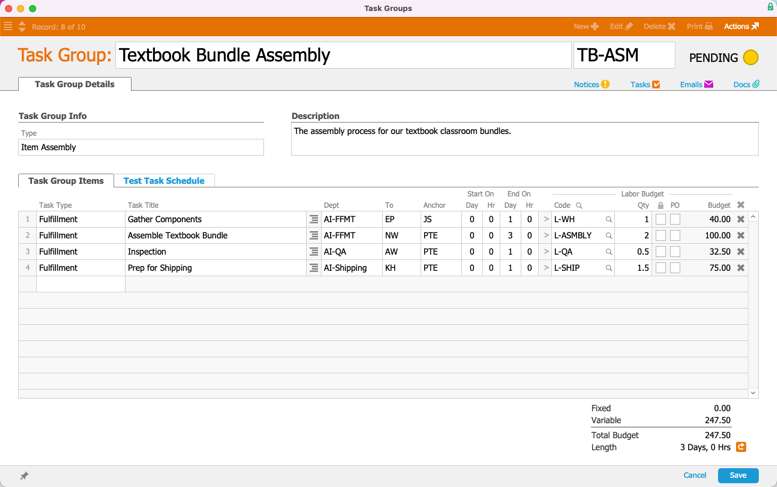
- Enter the group information (i.e. Task Group Name, Abbreviation, Type, and Description).
- Add Task Group Items (as many as needed to capture your standardized process). Each item you enter here will become a task for the order or other associated record. The info from these fields will populate the corresponding fields in the generated task.
- Task Type — Must enter a label for a new type or select from existing types before you can input the rest of the task information
- Task Title — Required field. Enter a brief title or description of the task.
- Desc (
 ) — Click the icon, then enter notes or a more detailed description of the task.
 - Dept — Select the department responsible for the task. Scheduling calculations will be based on this department's Start Time and End Time (Main Menu > Internal > Offices > office detail view > Departments tab).
- To — Optionally, you can specify a team member to be initially responsible for the task. (Note: An employee assigned in this field will take precedence over a default department-level assignment. Read more about job assignment logic.)
- Anchor, Start On, and End On — Specify the average time needed to complete the task. (See below for details.)
- Code — Required field. Click the field and select the appropriate time record to categorize the task.
- Qty — Enter the estimated number of hours needed for the actual task.
- Fixed Cost Lock (
 ) — If the task will take the same amount of time no matter the quantity of the product, mark this flag.
 - PO — If the task will be completed by another group that bills you, mark this flag.
Note: This flag will cause the system to generate a purchase order when this task is moved to Incomplete status. When that PO is closed, the task status will be updated to Complete.

- Click Save.
Note: aACE validates the information on your task group. If there are any errors, a dialog displays why the record could not be saved, so you can correct the data. - At the confirmation dialog, click Activate.
As you create the task group, the Totals in the bottom-right corner updates to display the estimated expense and time for the task.
Anchor, Start On, and End On Functions
Inputing values for the Start On and End On fields are crucial for a successful task group schedule.
For example, if a task should begin immediately after the previous task has been completed and has a 1.5 days window for being completed, you would enter these settings:
- Anchor — PTE
- Start On Day / Hours — 0, 0 (zeroes)
- End On — 1 Day, 4 Hours
Note: If you enter an invalid combination, the numbers here will be highlighted in red. Hovering your mouse over the numbers displays a tooltip explaining the error.
Read more about anchoring and scheduling.
Testing and Linking a Schedule
After you create the schedule for the task group, you can easily run a test to verify it will work as desired.
When you’re satisfied with the task group, link it to assembly item records where it will generate jobs and tasks.
Reporting on Tasks
In the Tasks module, you can print reports on current tasks and on the total allocation of resources (i.e. hours scheduled per team member) for each week.
- Navigate from Main Menu > Order Management > Tasks.
- Use the Quick Search bar to locate the desired task(s).
- In the menu bar, click Actions > Open Report Selector.
- Select the needed report.
