This guide explains how to add a custom menu option. It is intended for system administrators.
aACE allows system administrators to support their company workflows by modifying the main menu. Adding a custom menu option can assist in streamlining your processes.
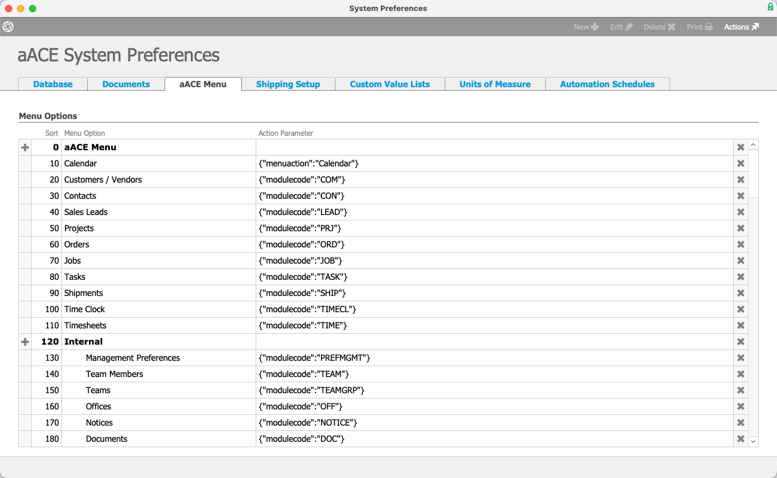
Creating a Menu Option
- Navigate from Main Menu > System Admin > System Preferences > aACE Menu.
- Click the Add icon (
 ) next to the desired folder.
A new record appears in the list. - Change the Sort number.
This rearranges the order in which menu options appear. Lower numbers appear at the top of the Main Menu, while higher numbers appear further down the list. - Fill in the Menu Option description.
This is the title of the option and what users see in the Main Menu. - Specify the needed Action Parameter:
- To launch an existing module, enter "(ModuleCode=____)" and replace the blank space with the code for the module you want to launch.
- To launch a custom menu option, enter “(MenuAction=____)” and replace the blank space with the code for the custom menu option you want to launch.
This action parameter is specifically designated for custom menu options. To program a custom menu option, see below. - To use the menu option as a folder to contain other options, leave the Action Parameter blank.
- Click the Sort column heading to re-sort the list.
To reposition a menu option, change the Sort value to a number that will place it in the desired sequence, then click Sort column heading again.

 ) next to the desired folder.
Once you have added new folders and menu options to the aACE menu, you must grant access to user groups for the new navigation.
Programming Custom Menu Options
When you program custom options, it is always helpful to coordinate with your aACE representative.
- Navigate to the Interface file.
- Locate and open the script called “UNIV: PROGRAMMING - Custom Menu Option”.
- Add the necessary code for the new menu option.
