This guide explains how to set up automated inventory tracking. It is intended for system administrators.
To set up inventory tracking, you must complete these three tasks:
- Activate inventory integration.
- Select the inventory management method.
- Select default inventory GL Accounts.
Activate Inventory Integration
- Navigate from Main Menu > System Admin > Preferences > Fulfillment.
- In the Inventory section, mark the flag to Enable inventory integration.

- Click Commit Updates.
Accounting Preferences
The inventory management method and default inventory GL account settings are located in the Accounting Preferences module. Navigate from Main Menu > Accounting > Preferences.
Select the Inventory Management Method
- At the Accounting Preferences module, click Data Entry.
- In the Inventory section, click the COGS Method dropdown list and select the appropriate option:
- LIFO (last in / first out) — May result in slightly reduced profits, but correspondingly lower tax rates.
- FIFO (first in / first out) — Typically results in additional profits, if the costs of items consistently increase.
Note: For special order, lot tracked, and serialized items, the COGS Method generally does not apply. Instead, specific items are received and shipped.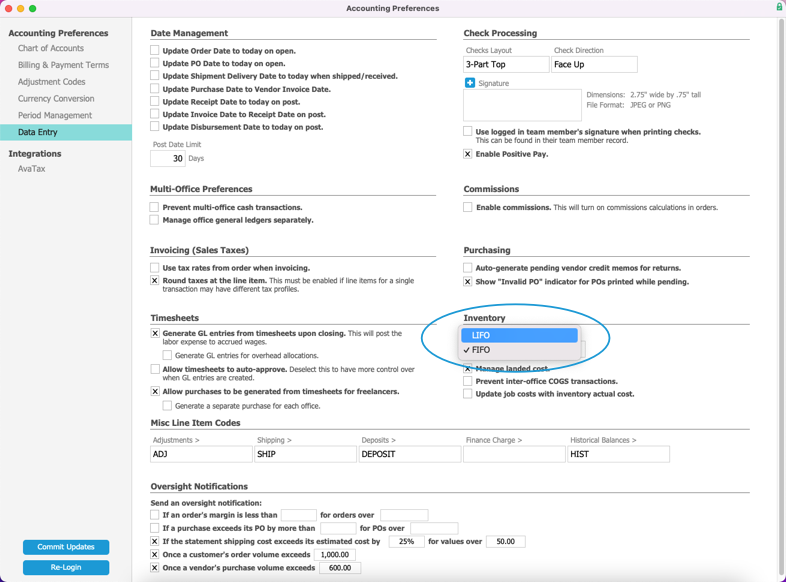
- Click Commit Updates.
Select the Default Inventory GL Accounts
- At the Accounting Preferences module, click Chart of Accounts.
- In the Assets section, click the dropdown for Default Inventory Account and select a default account.
- In the Liabilities section, click the dropdown for Accrued Inventory and select a default account.
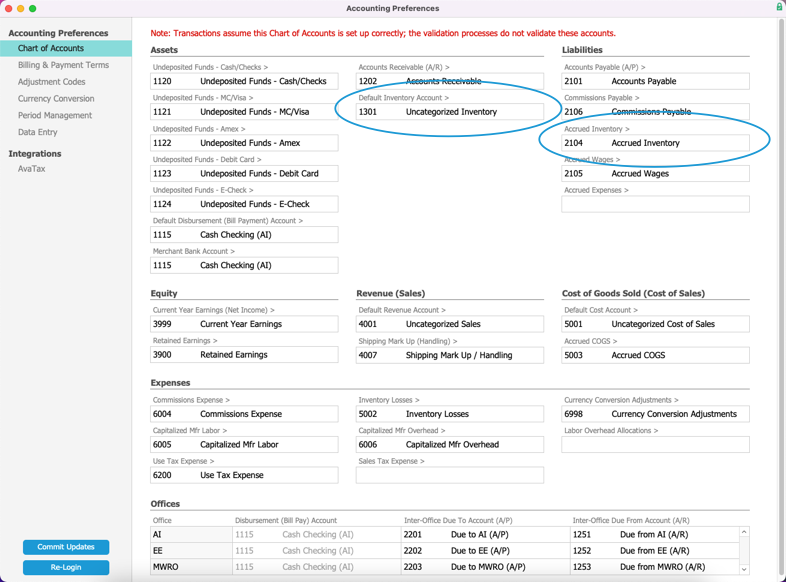
- Click Commit Updates.
