This guide explains how to properly export data from a report to a spreadsheet. It is intended for advanced users.
You can use a more hands-on method to export data from aACE reports to an Excel spreadsheet. This method groups the exported data, creating sub-summaries to parallel the data layout from the report.
The example module used in this guide will be the Line Item Codes report, "Est On Hand Value By Office, Code". However, these steps apply to other modules and reports.
- At the Line Item Codes module, use the Quick Search bar to locate the desired records.
Note: Larger data sets may take longer to process. - Click Print > Open Report Selector > Est On Hand Value By Office, Code.
Note: Some reports prompt you for additional input (e.g. As-Of dates). - With the generated report displayed, in the FileMaker menu, click File > Export.

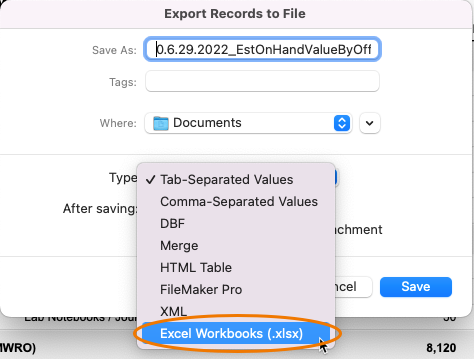
- At the export options dialog, name the file, note where it will be saved, set the file type to Excel Workbooks (.xlsx), then click Save.
- At the Excel Options dialog (if needed), you can enter the requested info or simply click Continue... to proceed.
- At the Specify Field Order for Export dialog, configure the print out as needed:
- Fields — Select which fields should be included in the exported data. Because all the fields appeared on the report, we recommend clicking Move All.
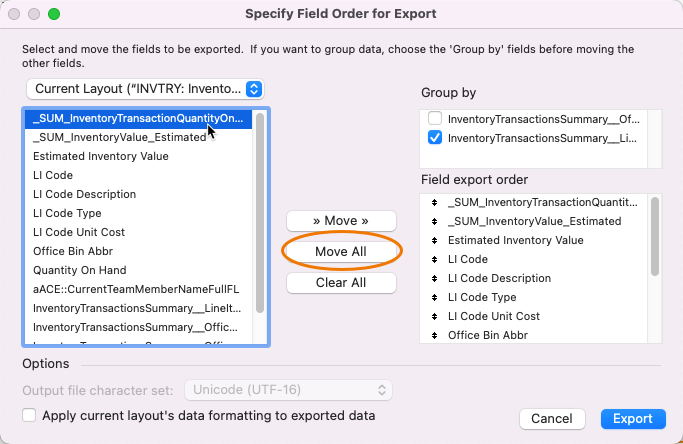
- Group By — Mark the flag for the desired option.

- Fields — Select which fields should be included in the exported data. Because all the fields appeared on the report, we recommend clicking Move All.
- Click Export.


Results from Exporting a Report
Excel reports can provide summary information based on the Group By settings you specify. For example, the LIC Inventory Value By Type report can provide totals of several important values:

In contrast, an export of the same data directly from the module shows only record-specific, non-summarized information:

