This guide explains how to test task group scheduling. It is intended for advanced users.
After you create a task group, you can verify that the anchoring and scheduling setup will work the way you intended:
- Navigate from Main Menu > Order Setup > Task Groups.
- Locate the desired task group, then click Edit.
- Click the Test Task Schedule tab.
- At the Test Job Info section, enter dates and times, then click Test.
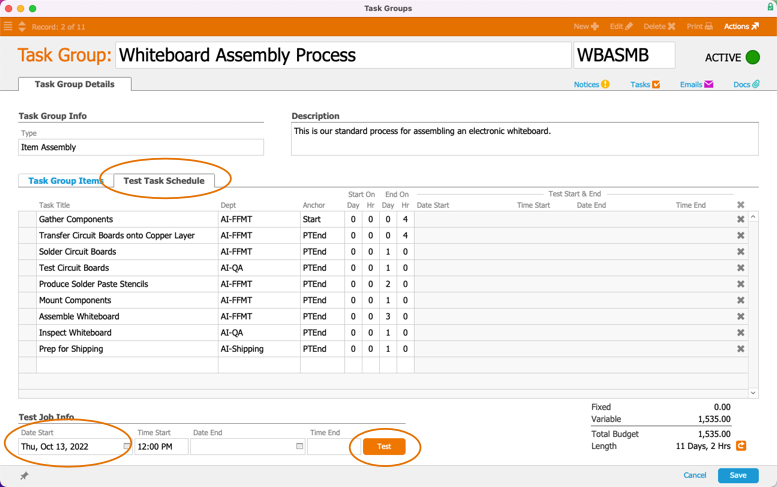
- Review the generated schedule to verify your settings work as intended and adjust the schedule as needed.
Note: Hover your mouse over the generated schedule to view details on how the days and times were calculated.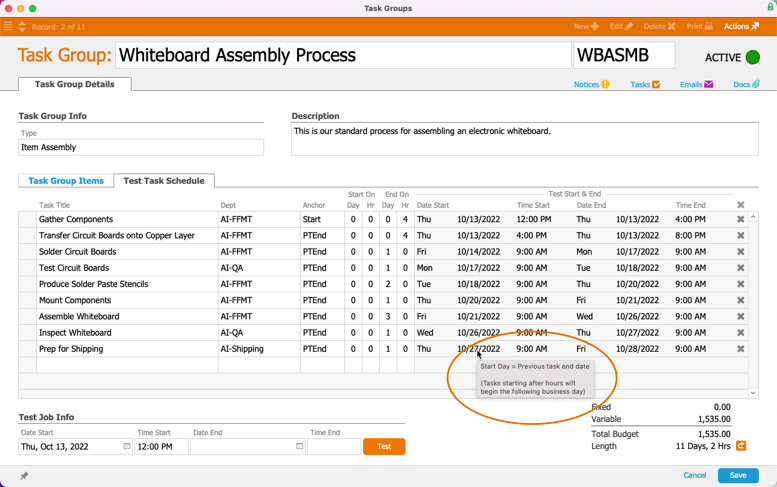
- Click Save.


Any changes to the test schedule are transferred back and saved on the main schedule.
Testing Your Task Group Functionality
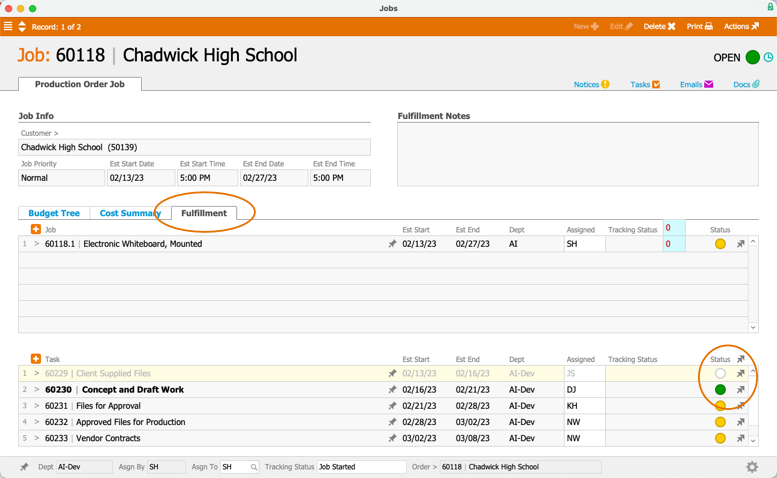
After you link a task group to an assembly line item code (LIC), aACE will generate a job to create the task group tasks when you open an order with that LIC. To verify that your new task group will function as intended, create a test order:
- At the Orders module, create a new production order, add an assembly LIC that is linked to the task group you want to test, then save and open the order.
- Click Management > Production.
- If needed, open the overview job (i.e. the job with a Title that matches the order Title) by clicking Actions > Open.
aACE auto-generates tasks linked to the order, based on the task group. - Click the Go-To chevron (>) for the overview job.
- At the job detail view's Fulfillment tab, mark the first task as complete.
Confirm that the next task is changed to Open status.