This guide explains different types of jobs and their conditions for auto-generation. It is intended for advanced users.
Jobs are records used to manage the fulfillment of an order. They help you keep budgets, costs, procurement, and tasks located in one area. You can fit jobs into your organization's workflows even better using aACE automation from various job and system settings.
Types of Jobs
aACE provides three types of jobs to support your production needs.
Order Jobs
An order job is the over-arching job created for fulfillment of the entire order. It is the 'parent' job for fulfillment. It holds all information regarding production for an order, including budget, cost summary, and any sub-jobs and tasks. An order job is not an order.
Different types of order records have different rules for generating order jobs:
- Production Orders — Always create an order job
- Service Orders — Always create an order job
- Sales Orders — Create an order job only if an item on the order generates a production job
Production Jobs
A production job is the 'child' job of an order job. Production jobs must be completed before related shipments can be made and before the related order job can be closed.
These jobs are identified with a number affixed at the end of their record ID (i.e. JOB10000.1).
aACE automatically generates a production job in two situations:
- An assembly item LIC occupies the root level (i.e. is not indented under another item) of any order
- An inventoried assembly item LIC occupies the root level of a production order
This is required because otherwise there would not be a logical place to apply costs (i.e. time and materials). Tasks for a production job will not populate until the job is opened. However, your system administrator can flag the preference to 'Auto-open production jobs' (see below) to have aACE open the job automatically.
Sub-Assembly Jobs
A sub-assembly job is a specific type of production job. Sub-assembly jobs must be produced or assembled before the final product can be completed.
These jobs are identified with a doubled affix at the end of their record ID (e.g. JOB10000.1.1).
aACE generates a sub-assembly job when an assembly or inventoried assembly LIC occupies a sub-level (i.e. is indented under another item). To place an LIC this way, you must use Options functionality.
Disabling Sub-Assembly Jobs
You can prevent aACE from automatically creating sub-assembly jobs for specific LICs.
- Navigate to the Line Item Codes module and locate the desired LIC.
- At the detail view, click the Setup tab, then click Edit.
- In the Preferences section, mark the flag 'Do not create a sub-assembly job'.
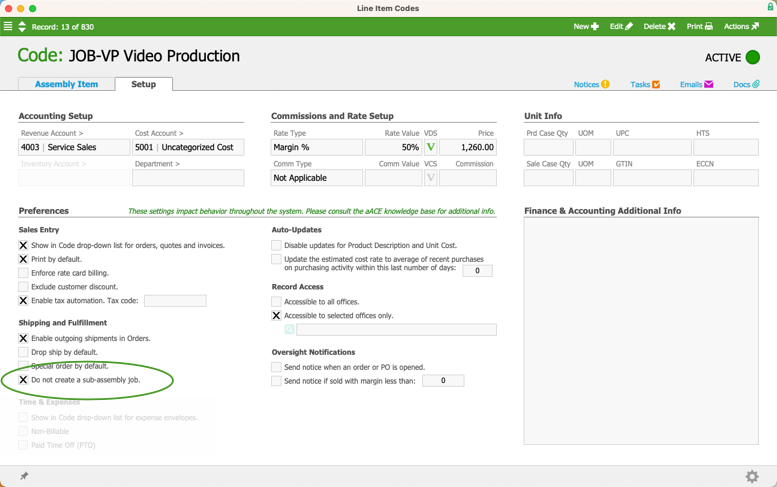
- Click Save.

When sub-assembly jobs are disabled, costs are still applied to the related order job, which inherits the sub-assembly job's bill of materials.
Standard Jobs
A standard job is always created manually — At the detail view of an order record, click Management > Fulfillment, then click the Jobs section's Add ( ) icon.
Standard jobs do not have budgets or BOMs. They are considered a 'bucket' for tracking cost entries without having it affect the actual, ongoing job. Only inventoried items can be added to the Cost Entry section; all other types of LICs are tracked in other modules.
Adding Tasks to a Job
You can manually add tasks to jobs. For Standard jobs, this is the only way to add tasks. For other types of jobs, you can add additional tasks as needed. You can manually add tasks either as individual tasks or as sets from a task group.
Note: Tasks can only be created for open jobs. To open a job, navigate to the order record's Jobs section (Management > Fulfillment). Click the job's line-level Actions ( ) icon, then click Open Job.
Adding a Single Task
- From the Order record detail view, click Management tab > Production tab.
- In the Jobs section, click the Go-To icon for the desired job.
- From the Job record detail view, navigate to the Tasks section. Click the Add (
 ) icon in the Tasks section, and click Tasks.
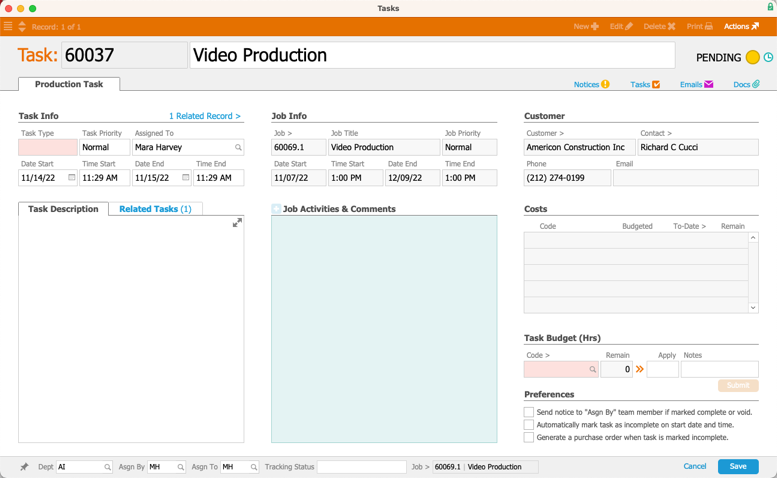
- Fill out the new task with the relevant information (e.g. Task Type, Code, Task Description, etc).
- Click Save.
 ) icon in the Tasks section, and click Tasks.
Adding a Task Group
- From the Order record detail view, navigate to the Management tab > Production tab.
- In the Jobs section, click the Go-To icon for the desired job.
- From the Job record detail view, navigate to the Tasks section. Click the Add () icon in the Tasks section, and click Tasks.

- At the Task Group Selector you can click the task group you want, use the Quick Search bar to find your desired task group, or create a new task group.
- Click Save.
Changing Task Sequence
You can change the sequence that tasks are listed on the order. The sequence of tasks is found on the job record detail view:

To change this sequence, hover your mouse pointer over the current sequence number, click and hold the mouse button, then drag the task higher or lower.
Additional Job Preferences
To streamline workflows, your system administrator can mark additional preferences for managing production jobs and tasks. Navigate from Main Menu > System Admin > Preferences > Fulfillment:
- Manage job tasks sequentially — Tasks for a production or sub-assembly job will be completed in their listed order. When the first task is marked complete, then second will open as "incomplete".
- Auto-open production jobs — When orders that include production jobs move to Open status, aACE will automatically open the production jobs and populate the needed tasks.
- Auto-close jobs when all tasks are complete — When all tasks have been marked complete, aACE sets the job to Closed status.
- Auto-close jobs when they are fully costed — When all jobs costs have been applied, aACE sets the job to Closed status.
- Auto-apply production cost on close — If a job is closed before all production costs are applied, aACE will automatically apply the remaining production cost.
- Mark as incomplete on start date — When a task's start date arrives, aACE will automatically set it to Incomplete status. The task status can be manually changed as needed.
