This guide explains how to re-enable LogMeIn. It is intended for system administrators.
To restart LogMeIn, you must first access the control panel, then manually disable and re-enable the application. You can access the control panel through the client and also via a browser.
Accessing the LogMeIn Control Panel
You may need to access LogMeIn differently, depending on your OS and specific workstation settings. Open the LogMeIn Control Panel using one of following methods:
Mac OS
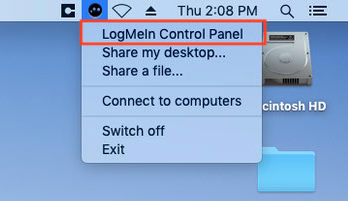
- If the LogMeIn icon is displayed on the menu bar — Click LogMeIn icon (
 )> LogMeIn Control Panel.
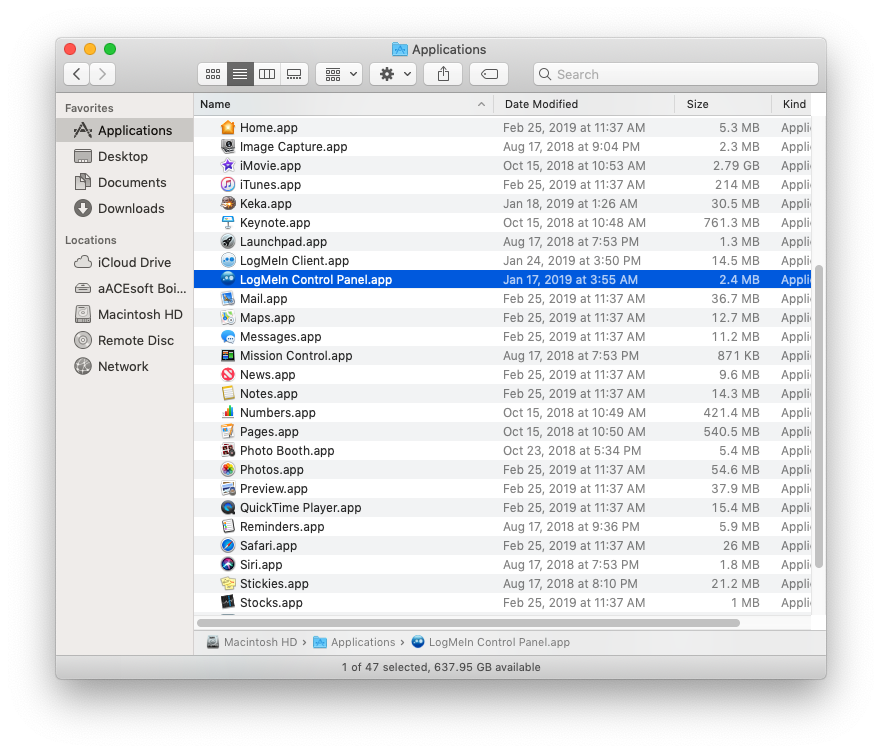
- If the LogMeIn icon not displayed in the menu bar — Open the Finder Applications folder and double-click the LogMeIn Control Panel application.

Windows OS
- If the LogMeIn icon is displayed on the taskbar — Click LogMeIn icon (
 ) > LogMeIn Control Panel.
- If the LogMeIn icon is not displayed on the taskbar — At the Start menu, type "LogMeIn" and double-click the LogMeIn Control Panel.

Restarting LogMeIn Via the Control Panel
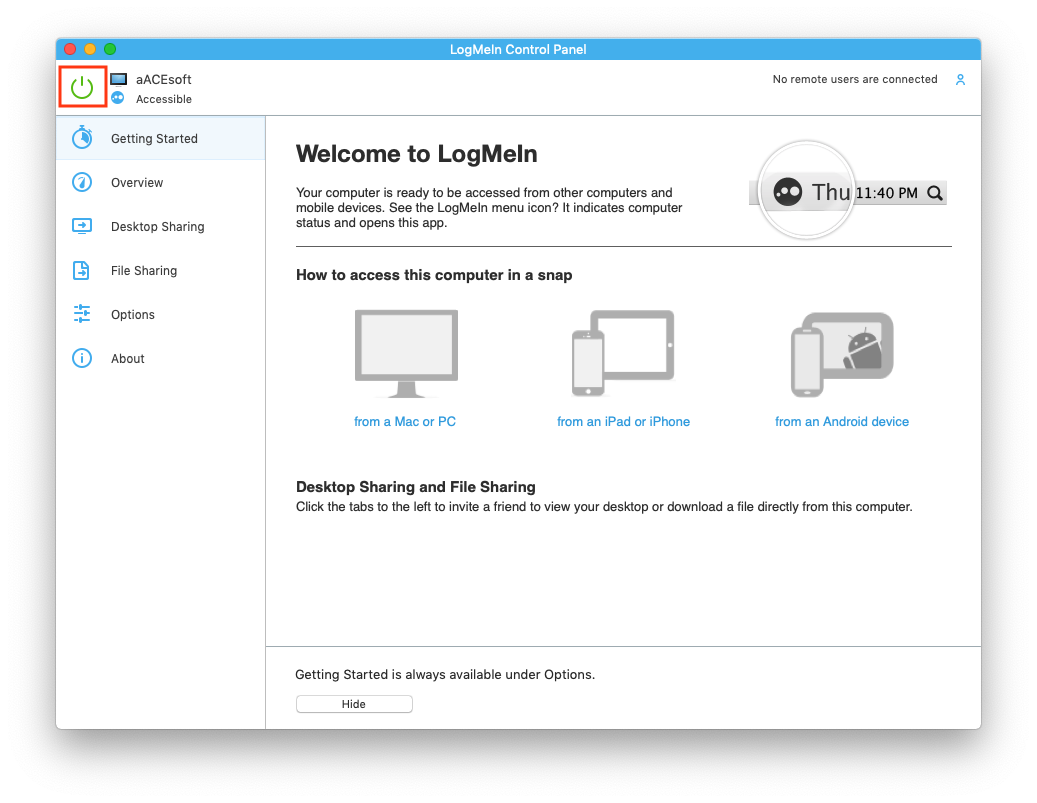
At the LogMeIn Control Panel, manually disable the application by clicking the green Power button in the upper-left corner. The Power button turns red.
Re-enable LogMeIn by clicking the Power button again.
Restarting LogMeIn Via a Browser
- Access the LogMeIn web site and click Log In at the right side of the header bar.
- Enter your credentials.
Note: You may have to enter your credentials on a GoTo company page. - Select the server you need to work on.
- Enter the credentials to connect to the remote computer.
- At the LogMeIn browser-based control panel, click Preferences > Advanced > View Reboot Options > Restart LogMeIn > OK.
The browser displays a page showing that LogMeIn is not connected while the service restarts.
After the service restarts, use the LogMeIn client to access the server.


 ) > LogMeIn Control Panel.
