This guide explains general guidelines and best practices for importing data into your aACE system. It is intended for general users.
aACE allows you to import new data from a FileMaker or Excel spreadsheet into most modules in the system. The import process itself is standard across these modules.
Note: The Line Item Codes module includes additional features for updating certain information on existing LIC records.
Understanding the following aspects of the aACE and FileMaker import process can help you work more effectively.
Data to Import
Data you can import into aACE is divided into two general categories:
1. Master Data
These are records required to successfully complete a transaction. Examples include offices, team members (employees), GL accounts, line item codes (products / services), companies, contacts, etc.
You can import this data using the standard process for importing records.
2. Transaction Data
These are records that usually track specific exchanges between your company and other organizations. Examples includes orders, invoices, purchase orders, purchases, GJ entries, counted items for inventory adjustments, etc.
You can import this data using the similar process for importing transactions.
Cached Data
All of aACE's import processes utilize temporary records in a FileMaker cache table. Using this cache table helps with validating the data prior to the actual import. These validations helps users avoid importing incomplete data that might cause problems later.
This careful approach requires that the Import Action at the import dialog be set to "Add". This refers to adding records to the cache table. This applies even when you are updating data on existing line item codes (LICs).
Accordingly, the cache table must be cleared for each import. During the import process, you may see a dialog message about deleting records:
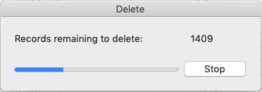 |
This action only affects the cached files from the previous import. Your actual business records are never deleted during an import.
Removing Data
The import process will not automatically remove all data from a field.
To remove data from a field, you must change numbers to zeroes and change text fields to 'null' or a similar term. If cells in your import spreadsheet are left blank, the import process will ignore them.
Steps of the Import Process
- Download an import spreadsheet.
- Prepare the data to be imported.
- (For importing transaction data only) Create a header record and click Edit .
- Import the records.
- Resolve validation errors (if any).
Best Practices for Importing Data
- Simplify your import spreadsheet by deleting columns that have no data.
- When using a spreadsheet exported from another system, copy and past aACE spreadsheet column titles into their respective places above the corresponding data.
Note: The FileMaker import process matches spreadsheet column titles to record fields, so you must be precise with matching the column title to a field title on a detail view. - To import new data to the desired record, add a new column(s) to the import spreadsheet. You must be precise with matching the column title to a field title on a detail view.
- To keep your imported data in aACE from having more decimals than you require:
- Use a spreadsheet editing software that will round by default.
- Include a rounding instruction in the calculation.
For example, if you need to update all costs by 5%, you can add a new column called "Rate Value Update" and enter a calculation such as: "Round(Rate Value*1.05,2)".
