This guide explains how to work with pricing and rate cards. It is intended for beginning users.
aACE allows you to work with line item code (LIC) pricing and rate card structures. Simple LIC setup will show you how pricing appears on an order, which you can then test and manage. Pricing structure can increase in complexity as you customize various parts of an LIC. This guide demonstrates several aACE settings and summarizes how the changes affect the order pricing that the end user sees.
Standard Pricing Set Up
The typical process for setting pricing includes four steps:
Note: You can create new records in your aACE system at each step in this process.
1. Set Up Pricing for an LIC
- Navigate from Main Menu > Inventory > Line Item Codes.
- Click New > Item.
- Enter the required initial information (e.g. Code, Description, and Type).
- Click Save.
- At the prompt to activate the LIC, click Not Yet.
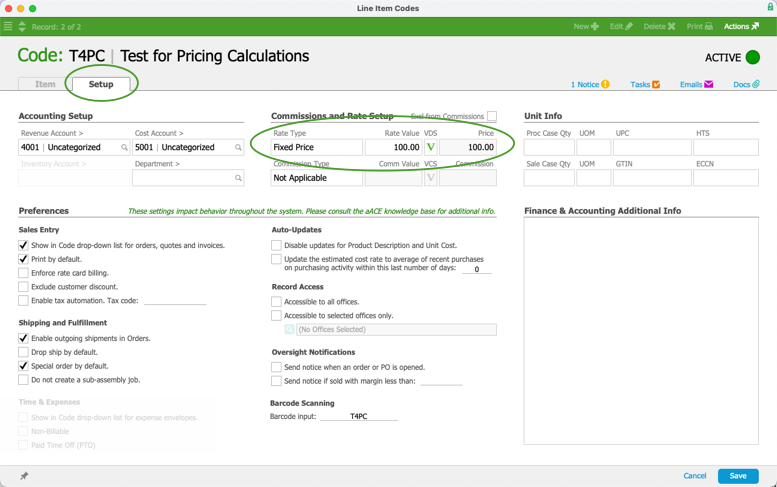
- Click the LIC record's Setup tab, then click Edit.
- Enter the pricing information, including Rate Type and Rate Value.

- Click Save.
- At the prompt to activate the LIC, this time click Activate.
Verify the LIC Pricing on a Test Order
- Navigate from Main Menu > Order Management > Orders.
- Click New > Sales.
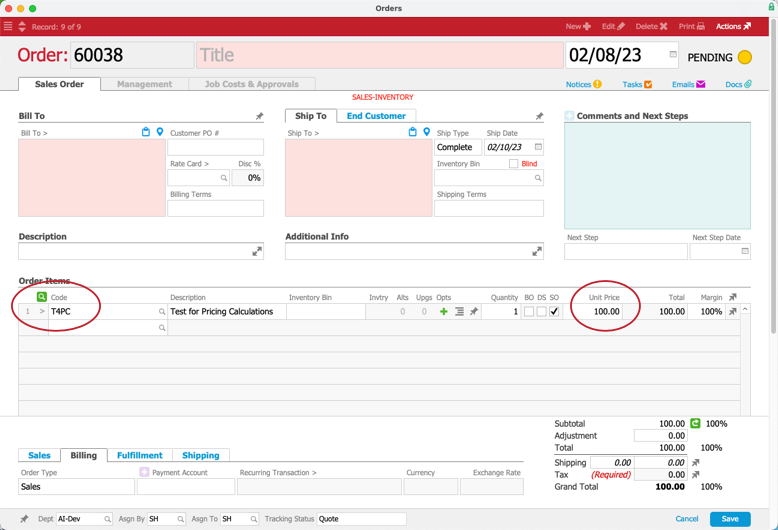
- Leave the Customer field blank to prevent any customer-specific pricing from affecting the test order. In the Order Items section, enter the code for your LIC.

- Confirm that the correct Unit Price displays.
- Cancel the test order.
2. Set Up a Rate Card
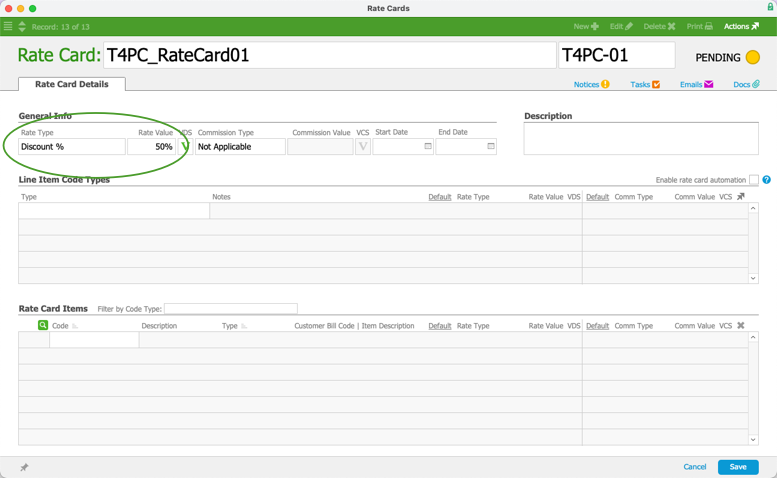
Setting pricing at the rate card General Info section allows you to set a flat discount percentage without having to worry about price updates on individual LICs.
- Navigate from Main Menu > Order Setup > Rate Cards.
- Create a new rate card, but leave the Line Item Code Types and Rate Card Items empty for now.

- Click Save and Activate.
Verify the Rate Card on a Test Order
Create another test sales order. Assign your new rate card and add your LIC with a quantity of 1. The LIC price should remain as specified on the LIC record because it is not linked to the rate card yet.

After confirming that the correct unit price displays, cancel the test order.
3. Set Up a Volume Discount
- Navigate back to your LIC record.
- Click the Setup tab, then click Edit.
- Click the VDS (
 ) icon next to the Rate Value field.
 - Mark the flag to activate the volume discount.
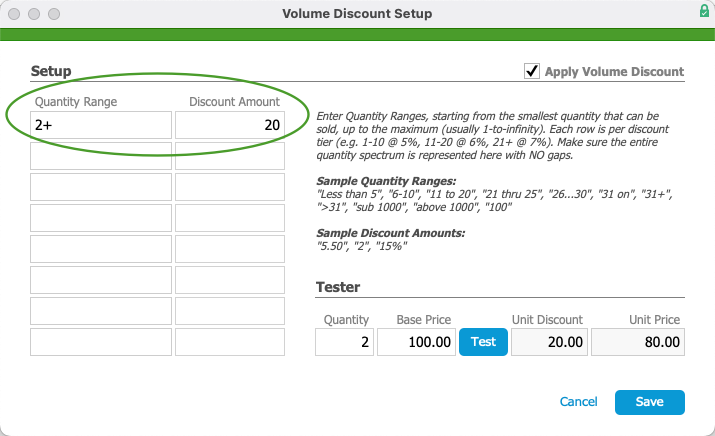
This activates the fields where you can specify quantity ranges and discount amounts. - Specify a volume discount setup (VDS).

- Click Save and Save.
Note: The VDS ( ) icon is now highlighted green.
Verify the VDS Pricing on a Test Order
Create another order and add your LIC with a quantity that will trigger your volume discount settings. aACE automatically applies the volume discount and adjusts the unit price:

After confirming that the correct Unit Price displays, cancel the test order.
4. Link the Rate Card to the LIC
Navigate back to your LIC and edit it. Display the Custom Prices tab, then link the Rate Card you created, leaving the Default checkbox marked. The discount you specified on the rate card displays:

Be sure to save your changes.
Note: After you link a rate card to an LIC, aACE will automatically transfer updates of pricing details on the rate card to the LIC record's Custom Prices tab.
Verify the Rate Card Pricing on a Test Order
Create a fourth test order. Again assign your rate card and LIC with a quantity of one. The price is now adjusted by the discount specified on the rate card.

Change the Quantity on the test order to 2. The unit price remains the same. This is because the rate card discount precludes the volume discount.
After confirming that the correct unit price displays, cancel the test order.
Additional Custom Pricing Features
You can have LICs that are linked to a rate card, but which use pricing details different from that rate card. At the LIC's tab for Custom Prices, edit the rate card line and clear the Default flag:

After you clear the Default flag, you can configure new pricing details on the LIC. aACE automatically transfers any changes here to the rate card as well.
The following sections show some of the most common pricing configurations.
LIC-Specific Fixed Price
With the Rate Type set to Fixed Price, the LIC will apply the Rate Value you specify here when you add both the rate card and the LIC on an order.
LIC-Specific Percentage Discount
With the Rate Type set to Discount / Markup / Margin % and a Rate Value specifying the percentage, aACE will calculate the price accordingly when you add both the rate card and the LIC on an order.

LIC-Specific Volume Discount
With the VDS button on the LIC record, you can open the VDS popup and specify volume discounts for this LIC (as described above). The VDS settings you specify apply when you add both the rate card and the LIC on an order. For more information on volume discounts for LICs and vendors, refer to Working with Volume Discount Pricing.

Pricing Details to Remember
- Rate cards can have many LICs and an LIC can be included on many rate cards.
- On a rate card record, the Rate Card Items section looks at the same data table as the LIC's record Custom Pricing section. The data is identical; just framed from different perspectives.
- If a rate card is specified on an order and an LIC on the order is linked to that rate card, the rate card pricing logic takes precedence (i.e. custom pricing).
Note: This can either be "Default" or overridden with custom logic. - If a rate card is specified on an order and an LIC on the order is not linked to that rate card, the LIC pricing logic takes precedence.
- Client discounts are taken into consideration after all the above have been considered. For example, an order can have a rate card discount, a volume discount, and a client discount all at the same time.
- Pricing logic does not 'cross levels'. For example, the rate at the order will not both apply a rate from the rate card item and also apply a volume discount set on the LIC.
Note: To see how aACE applies multiple discounts, read our guide on assigning customer discounts.
If you need additional help to create a pricing structure not covered in this walkthrough, contact aACE Support at the number listed on Getting Started with aACE Support.


 ) icon next to the Rate Value field.