This guide explains creating internal credit cards. It is intended for advanced users.
Before you can use corporate credit cards for payments in the various modules, you must enter the credit card as a GL account and configure related team member records.
Enter the GL Accounts
Each internal credit card must have a liability account. The credit card must be tied to a vendor, which is the credit card company you will pay for credit card charges (e.g. Visa or American Express).
- From the Main Menu, go to Accounting > GL Accounts > New.
- Enter the appropriate header account information:
- Record Type - Select Detail
- Header Account - Select the correct credit card header account
- New GL Account - Enter the new account number and name
- Bank Account - Ensure this preference is enabled
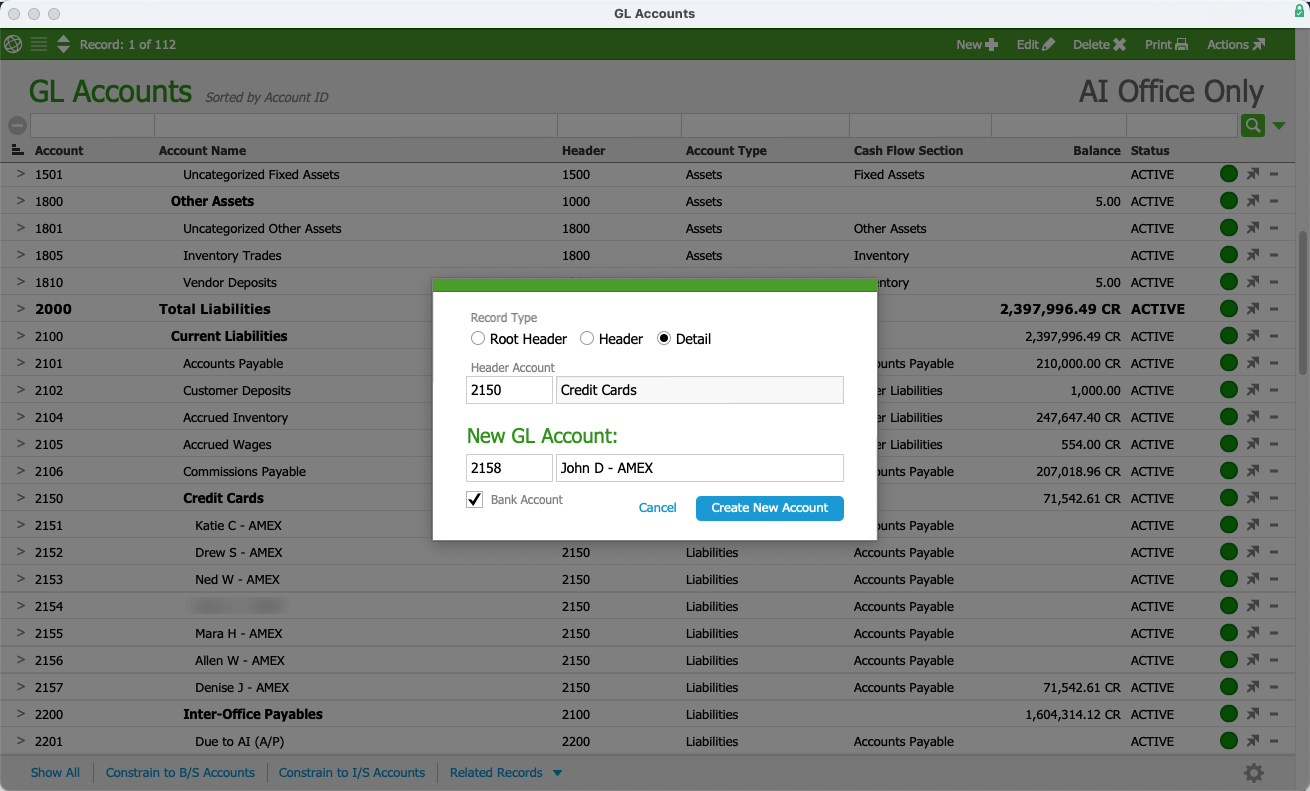
- Select Create New Account.
The record will appear in the GL Account list view under the header account you selected. - Go to the new account detail view and select Edit.
- Confirm the following preferences are enabled:
- Credit Card — The card will appear in the appropriate aACE dropdown lists.
- Bank — The card is a source of cash and will be reconciled.
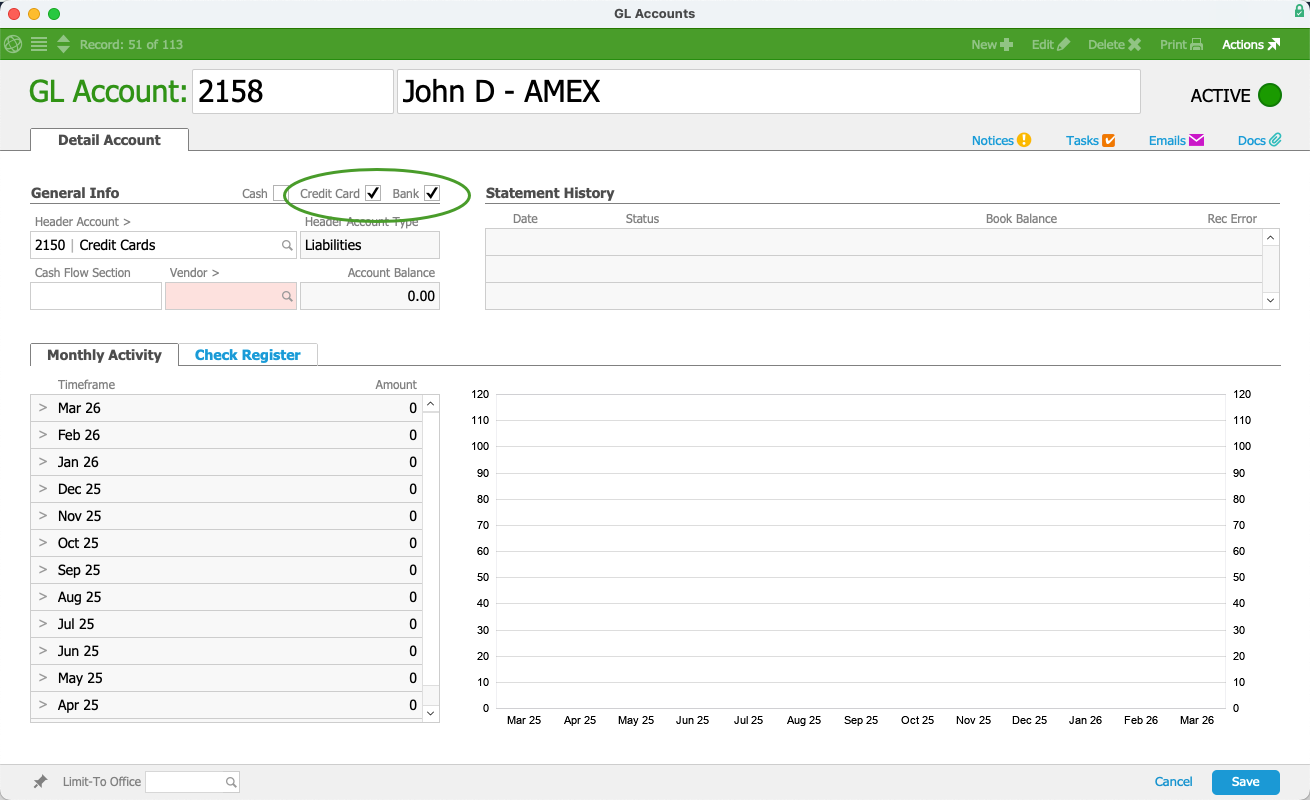
- Select a vendor in the Vendor field.
- Select Save.


The credit card will be available in the credit card dropdown list for payment dialogs in various modules.

Configure the Team Member Records
You must assign the new credit card GL account (e.g. John B—AMEX) to the team member record before the team member can specify credit card and personal expenses during the expense envelope process.
- From the Main Menu, go to Internal > Team Members.
- Use the Quick Search bar to locate the team member record.
- Select Human Resources, then select Edit.
- In the Compensation Setup section, select the Credit Card Account field and select the appropriate credit card account.
- Select Save.
