This guide explains adding custom report headers for business documents. It is intended for advanced users.
aACE allows you to use a single report header or personalize the report headers by office.
Update a Report Header for All Offices
Report headers for all offices display on documents such as invoices, purchase orders, and receipts regardless of which office a user is logged in to.
- From the Main Menu, go to Internal > Management Preferences > Branding.
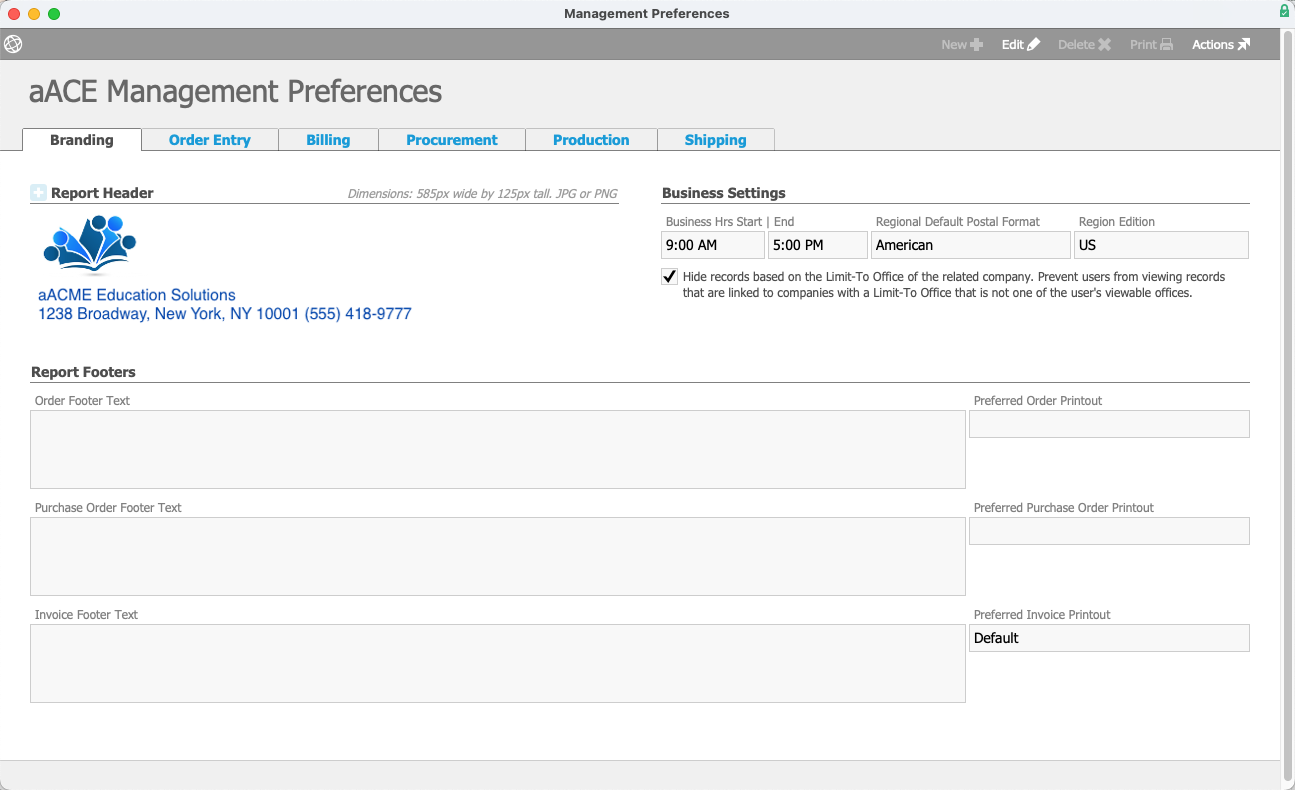
- Select Edit.
- Select the Add icon (
 ) to upload a new header.
 - Locate the new header image file and select Open.
Use images measuring 585 x 125 pixels in .jpg, or .png format. Select Save.

 ) to upload a new header.
Update a Report Header for an Office
Once you upload an office-specific report header, documents such as invoices, purchase orders, and receipts for that office will include the branding.
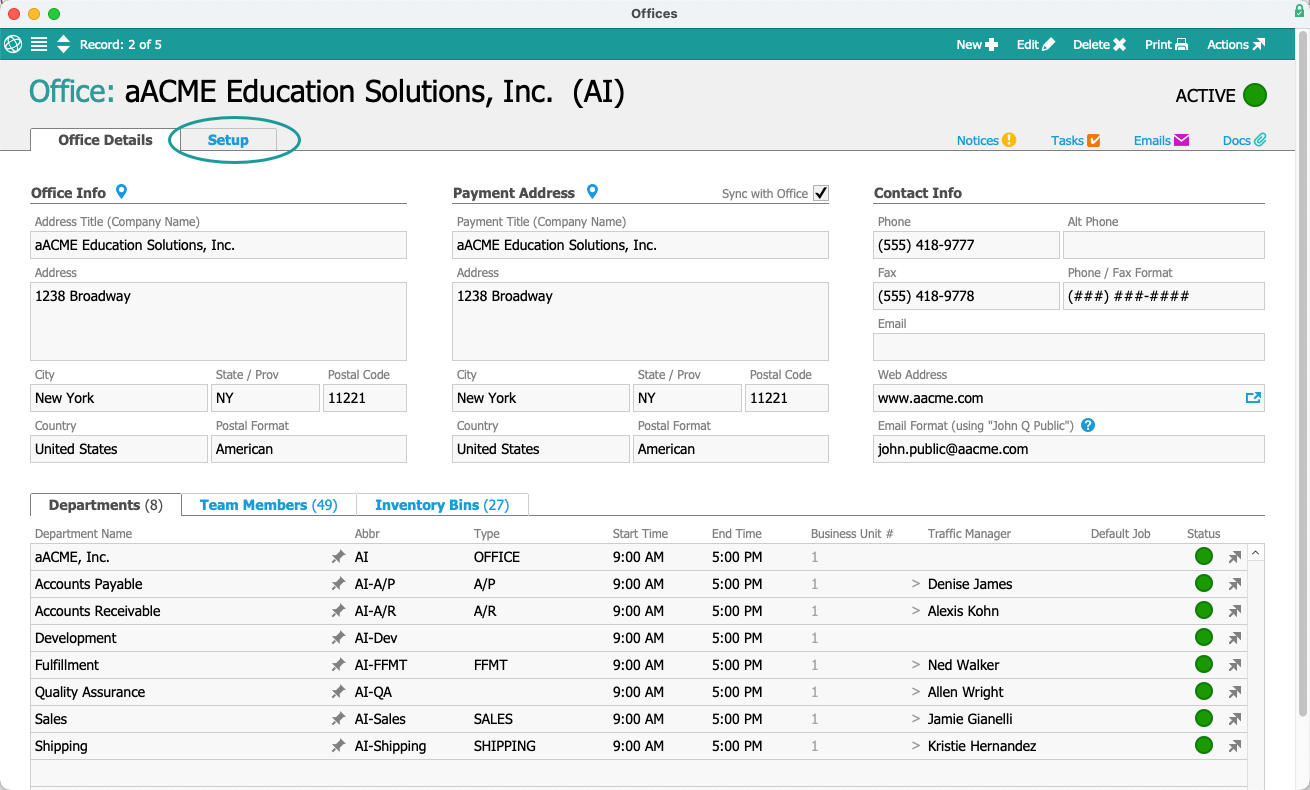
- From the Main Menu, go to Internal > Offices.
- Use the Quick Search bar to locate the office record.
- At the detail view, select Setup.
- Select Edit.
- Disable the preference Use default Report Header.
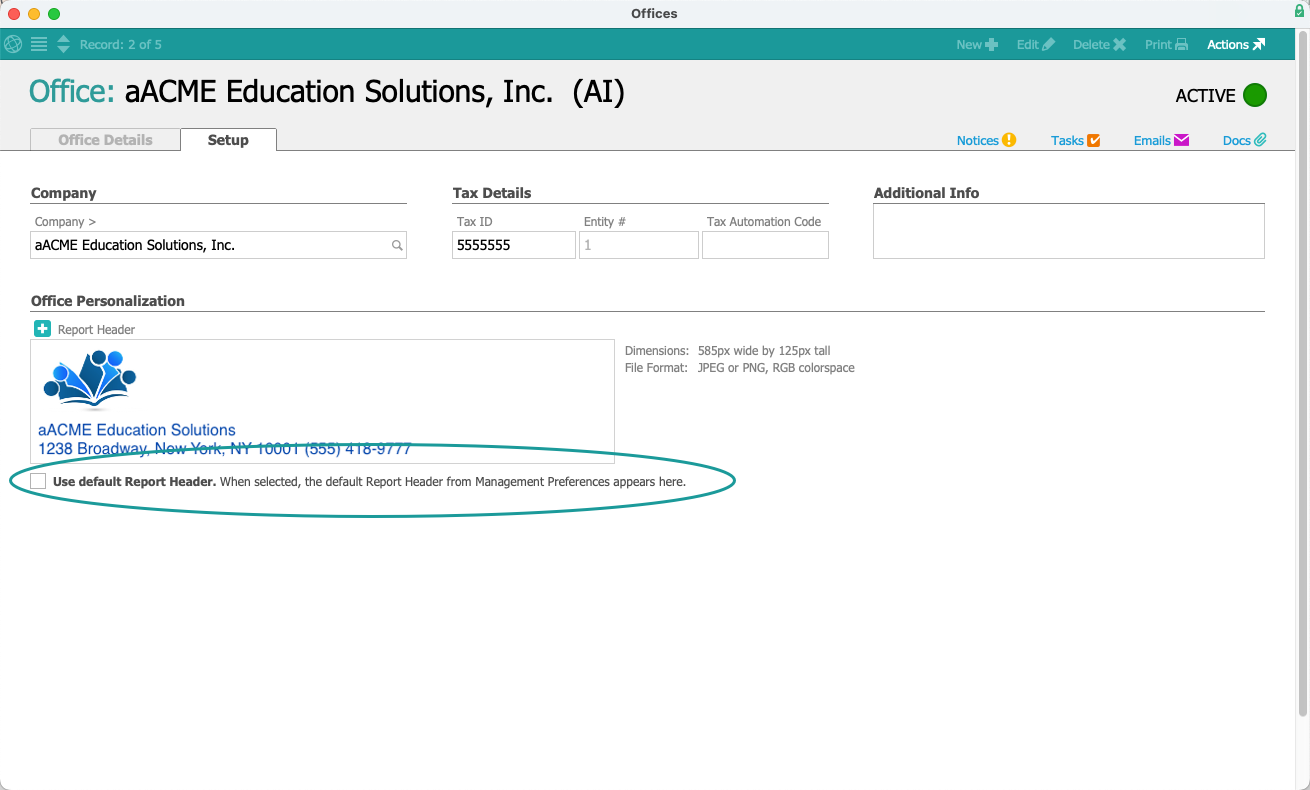
- Select the Add icon (
 ) to upload a new header.
 - Locate the new header image file and select Open.
Use images measuring 585 x 125 pixels in .jpg, or .png format. - Select Save.


