This guide walks you through tasks for learning how to work with purchase orders in aACE. It is intended for new users in the Discovery process.
Introduction
This training guide starts by exploring accounts payable and purchase orders (POs), teaching you the basics of how transactions work in aACE.
We cover these processes first because they are generally consistent across companies and serve as a basis for entering inventory data into your system. Don't forget to watch the webinar that focuses on purchase order functionality.
This training focuses on the Line Item Codes and Purchase Orders modules.
Line Item Codes
The Line Item Codes (LICs) module is named as such because it involves entering products and services as line items on purchase orders and other records. Feel free to explore further by reading more about line item codes here.
Open the LICs module using the Main Menu features you learned in Discovery Training: Basics. From the Main Menu, click Inventory; then click Line Item Codes.

The layout of this list view is organized similar to list views you worked with previously.
Create a New Line Item Code
Your Discovery system includes sample LIC data. To practice working with aACE master data records, we'll create a new LIC that is relevant to your organization. This will provide a record that makes it easy to observe changes as aACE processes run.
- From the Main Menu, click Inventory, and then click Line Item Codes.
This displays the LICs module. - In the LICs module header, click New.
This displays a popup menu where you can select from various LIC record types. Each record type offers specific functionality for different business needs. For this training guide, we'll work with an inventoried item.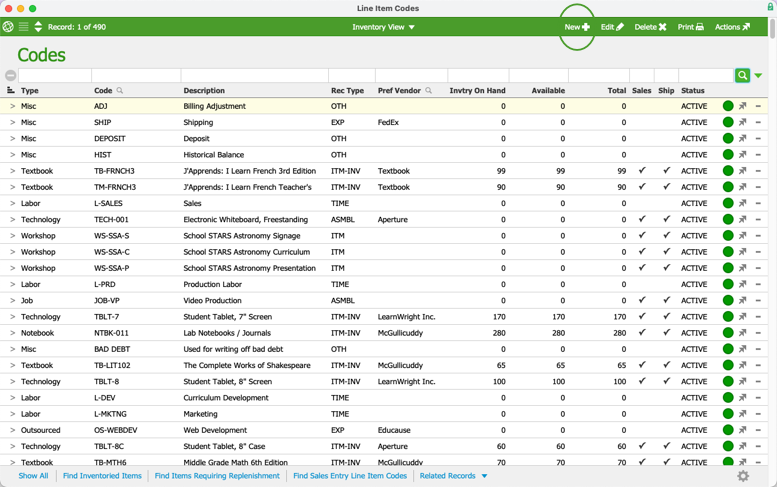
- Click Inventoried Item.
This creates a new LIC record and puts the detail view into a mode to make changes to the record.
- Enter the required information for your LIC in the fields that are shaded pink.
Leave all other fields and tabs blank — you will be looking at how aACE learns and gathers data based on transactions moving through the system. You can recreate an actual product from your current inventory or invent something similar. For this training, it should be a product that your company sells, but which does not require any labor to produce.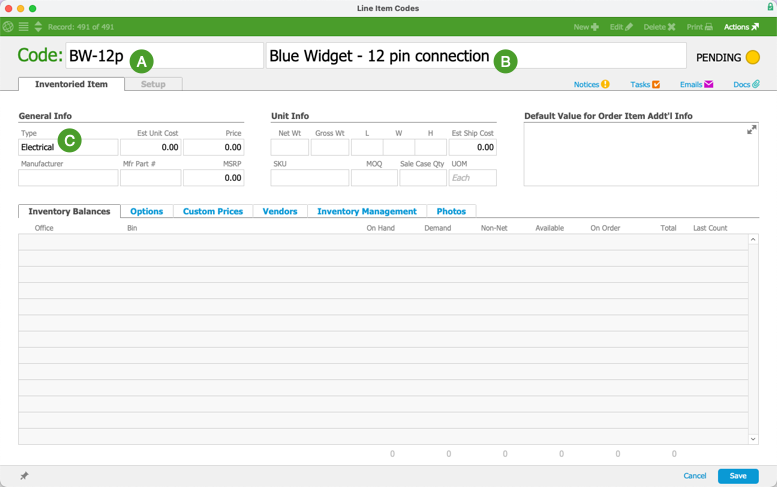 If you can’t think of an item you keep in stock for sales orders, please invent data for a widget.
- Code — Enter an abbreviation for your LIC.
- Description — Enter a brief summary of what the LIC is.
- Type — Click this field and select one of the sample product groups.
- In the bottom-right, click Save.
This triggers the aACE validation processes. If the required fields have acceptable data, aACE displays an activation prompt.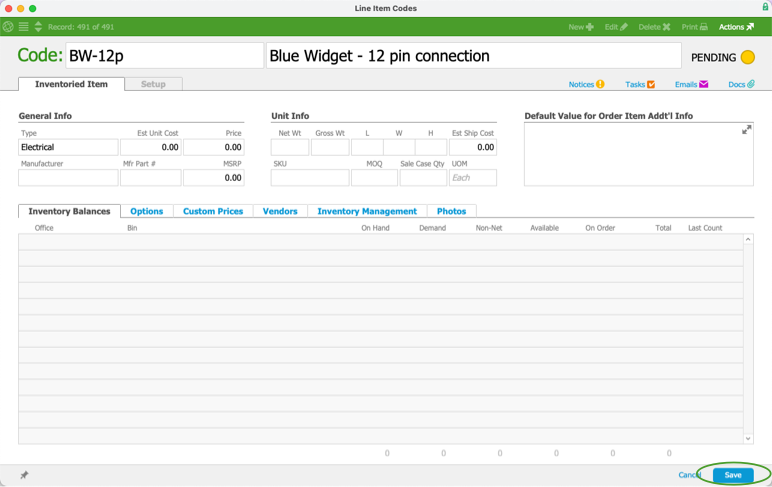
- Click Activate.
You can make other changes to the LIC later.


 If you can’t think of an item you keep in stock for sales orders, please invent data for a widget.

Purchase Orders
The next step involves initiating the process to order your new LIC. By creating purchase orders, we not only record inventory, but also lay the groundwork for the next training guide on Sales Orders. Refer to Working with Purchase Orders for more information on POs, including an explanation on the difference between POs and purchases.
First Purchase Order
- From the starting level of the Main Menu, click Accts Payable, and then click Purchase Orders.
This displays the Purchase Orders module list view. The layout includes many of the same features as the modules you worked with previously.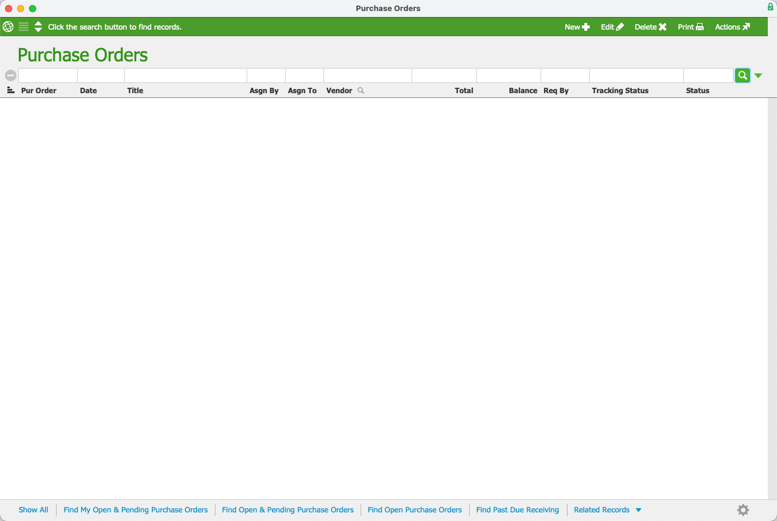
- To check if there are any POs already in your Discovery system, you can use the Quick Search links in the footer.
We'll practice creating a new purchase order, whether or not your system includes other POs. - In the header, click New.
This creates a new PO record and puts the detail view into a mode to make changes on the record. It shows the Vendor selection popup. Required fields are shaded pink.
- At the right side of the Vendor field, click the Search icon (
 ).
).
This displays the Companies Selector.
- Use the Quick Search bar to locate the vendor company you created as part of the previous learning guide.
- Click the vendor name in the Companies list.
This transfers the company to the Selected Companies list.
- Click Save.
This returns you to the PO record with information from the selected vendor autofilling the address, payment terms, etc. - In the PO Items section, click the Search icon (
 ).
).
This displays the LICs selector.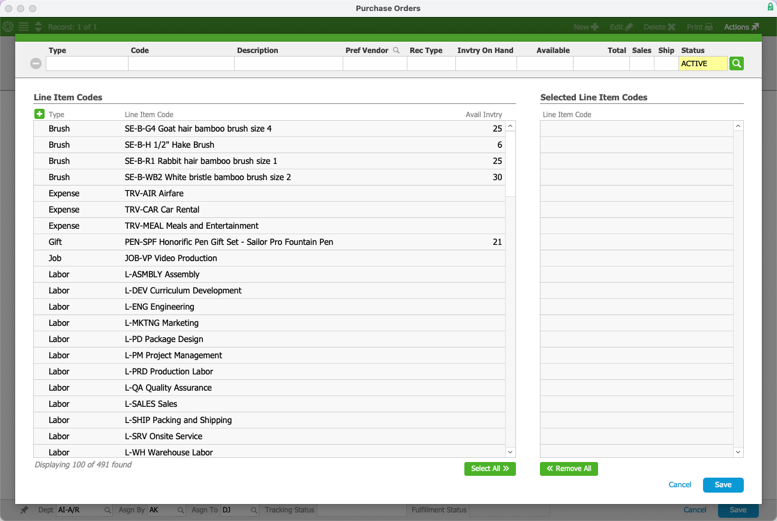
- Use the Quick Search bar to locate the LIC you created earlier, searching for the Code or the Description.

- Click the LIC name in the Line Item Codes list.
This transfers the LIC to the Selected Line Item Codes list.
- Click Save.
This returns you to the PO record with information from the selected LIC autofilling various fields.
- Change the Quantity to ten and the Est Unit Cost to a plausible cost.
This will update the total values for the line and for the entire PO.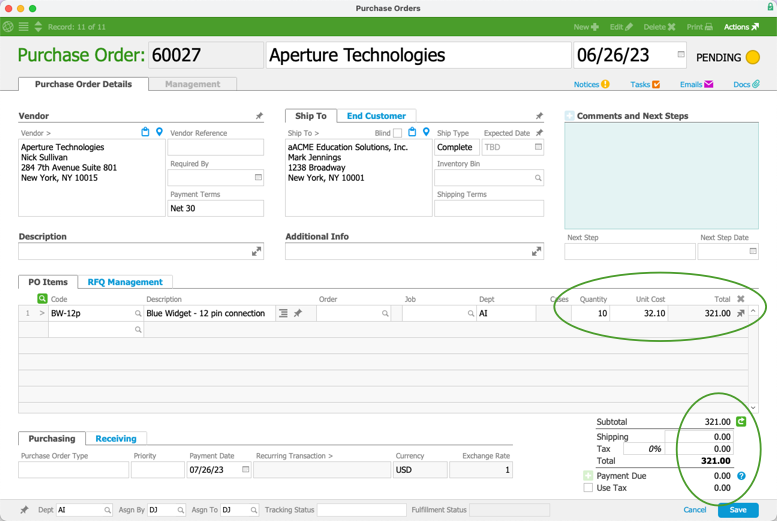
- Click Save.
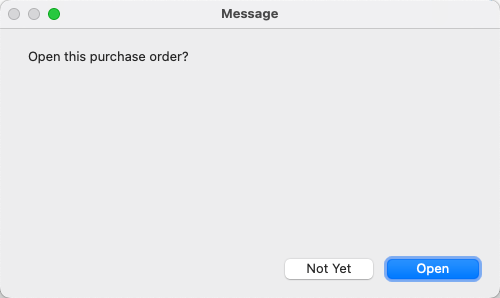
This triggers the validation processes. If the required fields have acceptable data, aACE displays a prompt to open the PO. Note: If aACE does not prompt you to open the PO, you can click the Actions icon (
 ) in the header and select “Open PO”. This will re-run the validations and display a prompt noting changes that need to be made on the record for it to open. You may need to resize the popup window to ensure you can view all the information.
 - Click Open to open the PO.


 ).
).

 ).
).


 Note: If aACE does not prompt you to open the PO, you can click the Actions icon (
Additional Info about POs
Another helpful tool for working with POs is the Management tab. This tab gives you a summary of a POs progress, as shown in the quantities received and purchased. It also provides easy access for creating related shipment records and purchases.

Second Purchase Order
At this point, aACE has gathered some information to use in automating your workflow. Create a second PO to see this in action.
- In the Purchase Orders module header, click New.
This creates a new PO record and puts the detail view into edit mode. - For the vendor on the second PO, begin typing the first few letters of the company you picked for the first PO.
This triggers aACE's type-ahead feature and it helps you fill in the vendor name.
- Press Enter.
This prompts aACE to accept the selected vendor name and again retrieve the contact data to populate the address fields. - In the PO Items section, click the Code field.
This displays a dropdown list of LICs recently used on POs for this vendor. It includes the LIC you created and used on the first PO.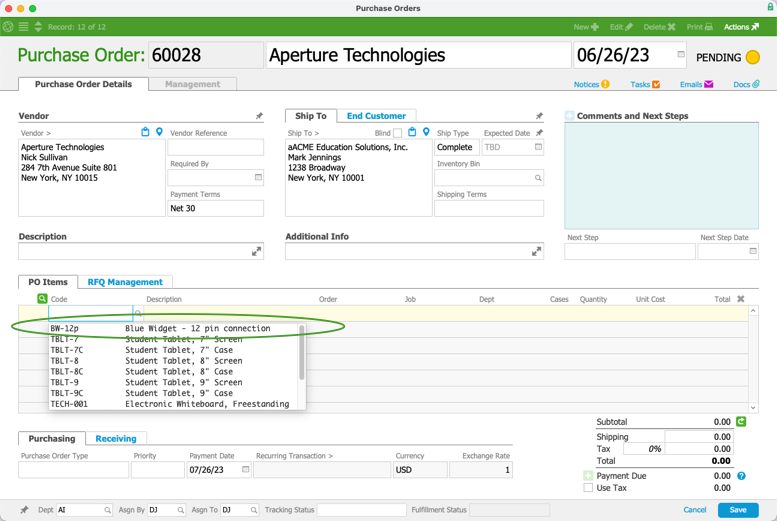 Note: FileMaker sometimes quickly shifts focus when you click in a field. This can cause a dropdown list to be hidden again. With the cursor in that field, you can display the dropdown list again by pressing the ESC key.
 - Select the LIC you created.
This triggers aACE to autofill information from the LIC record. Note that the Unit Cost is automatically populated with the amount you entered previously.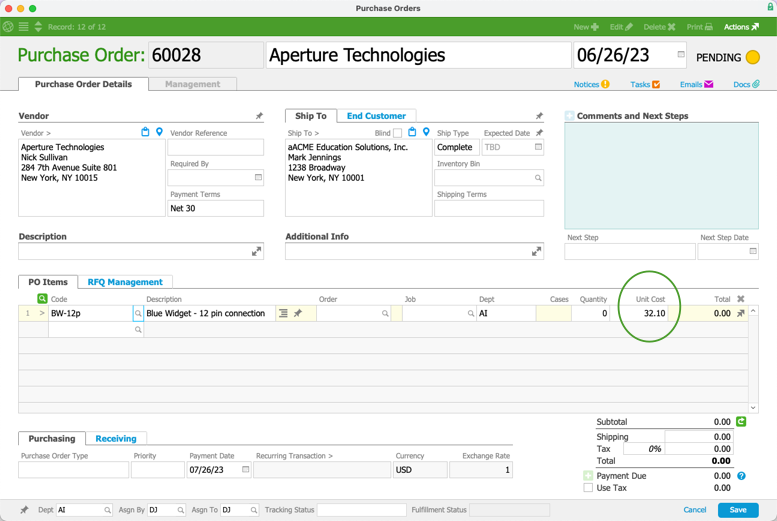
- Change the Quantity to ten.
This updates the totals.
- Click Save.
This triggers the validation processes. - When you see the confirmation dialog, click Open.

 Note: FileMaker sometimes quickly shifts focus when you click in a field. This can cause a dropdown list to be hidden again. With the cursor in that field, you can display the dropdown list again by pressing the ESC key.


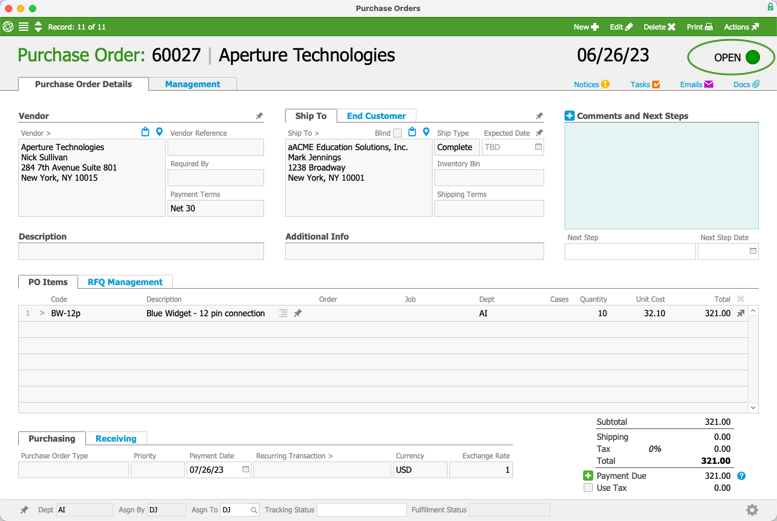
Your open purchase order should look similar to the purchase order example below:
 As you open additional purchase orders with other LICs, aACE will continue to create relationships between those LICs and the vendors you purchase them from.
Incoming Shipments
Now that you've successfully placed an order with your vendor, let's fast forward to the stage when the shipment has reached your facilities. You'll need to receive the shipment into your inventory.
- From the Main Menu, click Order Management, then click Shipping Log.
This displays the Shipping Log module's list view, showing shipments from sample data that are Pending or otherwise in transit. This list view matches the general layout of other modules you've worked with.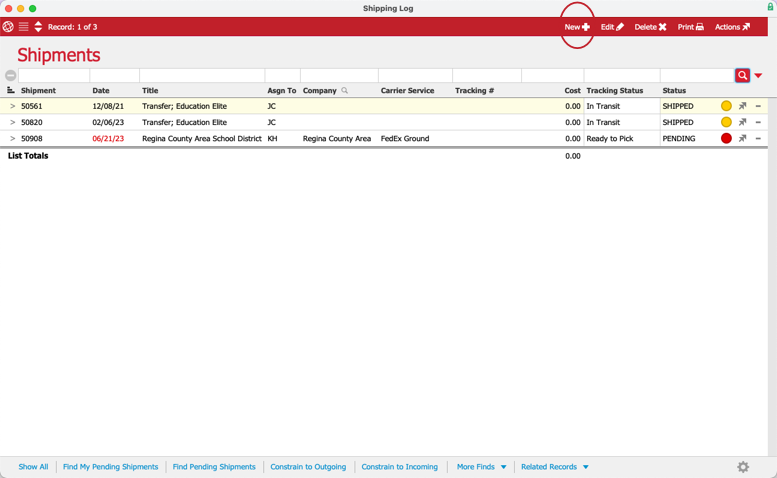 Note: Status indicators highlight different details in different modules. In the Shipping Log, Pending records show a yellow indicator. This status also applies to internal inventory transfers and transfer shipments that have been shipped from one of your locations, but have not been received yet in the other location.
 - In the header, click New.
This displays a dropdown list showing the types of shipments you can work with.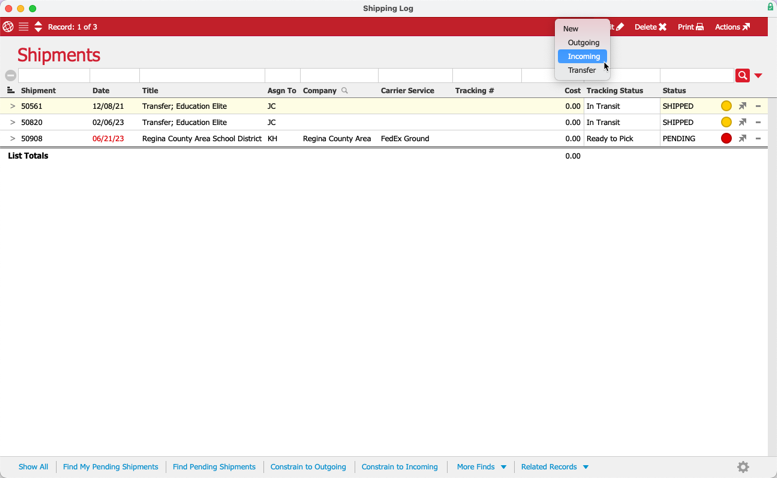
- Click Incoming.
This creates a new shipment record and puts the detail view into a mode for you to make changes on the record. The Ship From selection popup is displayed and other required fields are highlighted pink.
- For the Ship From Company, type the first few letters of the company you picked for the first PO.
This triggers aACE's type-ahead feature to help you fill in the vendor name. Selecting this vendor prompts aACE to display the Purchase Order selector. This is because there are multiple POs for this vendor that are Open. aACE needs us to confirm which PO items are included in this shipment.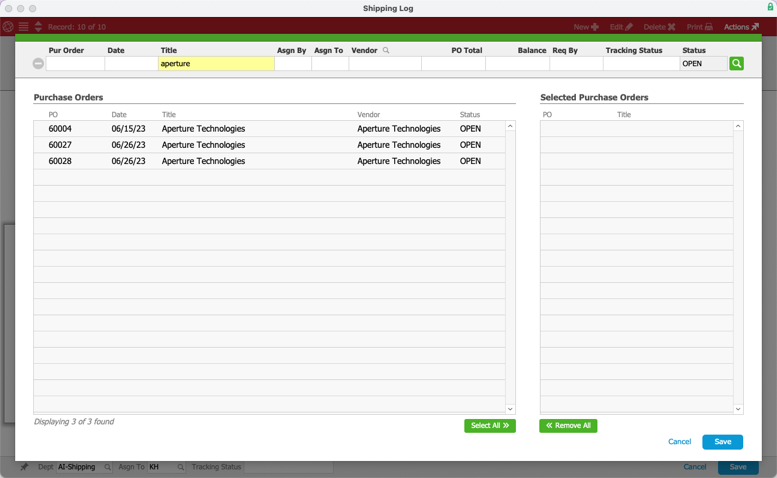
- In the Purchase Orders list, click the first of the POs you created.
This moves the PO record to the Selected Purchase Orders list. Note: If both shipments arrived at one time, you could include both POs in a single shipment. It is always best to record information in aACE that matches the real situation. This makes it easier for you to track progress and to audit your system later.
 - Click Save.
This autofills the vendor address and enters the LICs from the PO into the Packing List section. Because shipments sometimes do not include the full, ordered quantity, aACE leaves the Quantity field at zero.
- Next to the line's Expected Quantity, click the Quantity Transfer icon (
 ).
).
This moves the number in that column to the Quantity field. If there are multiple LICs in a shipment, you can transfer all quantities by clicking the Quantity Transfer icon next to the column title. You can also manually enter a number in the Quantity field.
- Click Save.
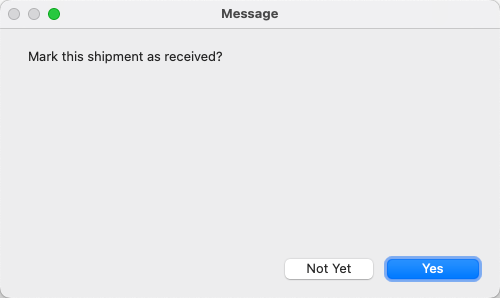
aACE runs validations on the shipment record. - At the confirmation dialog, mark the shipment as received by clicking Yes.
 Note:
Note: 


 Note: If both shipments arrived at one time, you could include both POs in a single shipment. It is always best to record information in aACE that matches the real situation. This makes it easier for you to track progress and to audit your system later.


After you have marked the shipment as Received, this update is reflected on the detail view.
Purchases
After you have received the product on your PO, you can process a vendor invoice by creating and posting a purchase. Read more about working with purchases.
- From the Main Menu, click Accts Payable, then click Purchases.
This displays the Purchases module list view, showing any existing Open purchase records that are assigned to you. - In the header, click New.
 This creates a new purchase record and puts the detail view into a mode for you to make changes on the record. The Vendor selection popup is displayed and other required fields are highlighted pink.
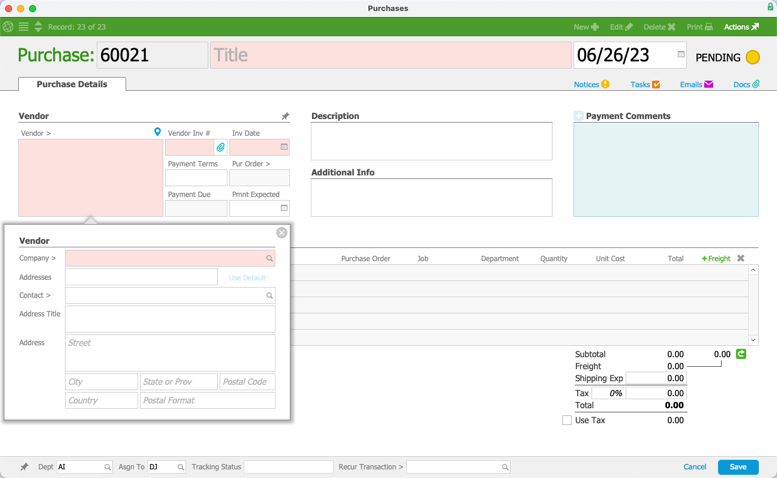
- Type the name of the vendor you received the shipment from.
This prompts aACE to display a dialog that asks if you want to select an existing PO to use for building the purchase. This requires saving the record in its current state. Since the only change made this far was assigning the vendor, saving the record now is fine.
- Click Save.
This prompts aACE to display the Purchase Order selector again.
- In the Purchase Orders list, click the first PO you created.
This moves the record to the Selected Purchase Orders list.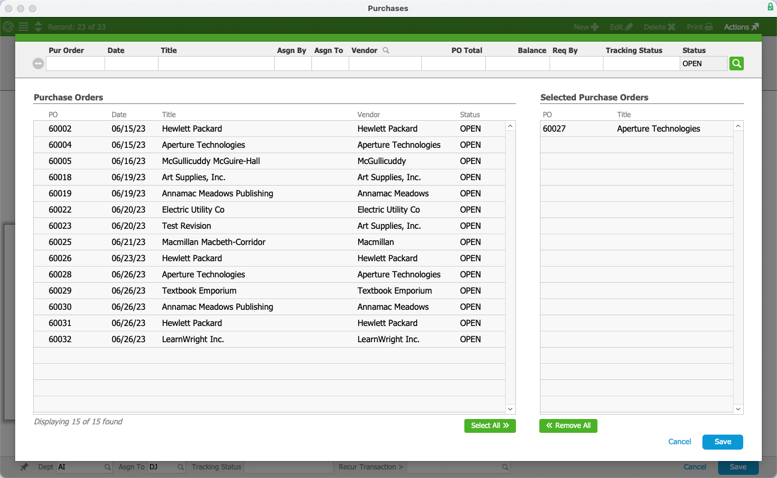
- Click Save.
This displays the purchase record again with details from the PO autofilled. Other required fields are highlighted pink.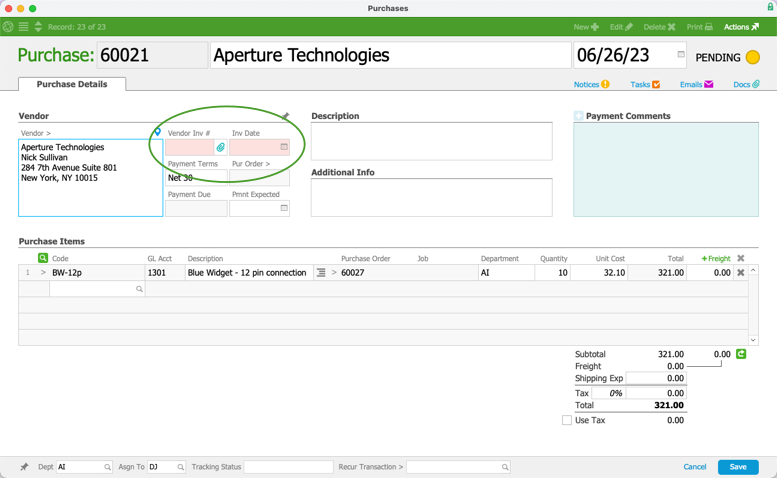
- Enter any number in the Vendor Invoice # field.
Note: When you go-live with aACE, you will need to enter accurate vendor invoice numbers. - Click the calendar icon in the Invoice Date field, then select today's date.
- Click Save.
- When you see the confirmation dialog, click Open.
The record is opened and ready for a team member to create a disbursement and pay the purchase.
 This creates a new purchase record and puts the detail view into a mode for you to make changes on the record. The Vendor selection popup is displayed and other required fields are highlighted pink.


Connections Between Records
When a purchase record is opened, aACE updates the related records. For example, it links the vendor on the PO to the LICs on the PO. To see these changes, you can open the LIC record directly from the Purchase Items list:
Click the go-to arrow (>) for the LIC. This displays the detail view of that product. The links to vendors are included in the Vendors tab. The tab label shows a number noting how many vendors are linked to the LIC.
Click the Vendors tab to see the details:

This view includes two portals. The upper portal shows the vendors linked to this LIC. The lower portal shows existing POs that include this LIC. The two POs you created are listed here. One PO is still Open and the other Closed.
Test Your Understanding
After working through the tasks in this training guide, use this online exam to see how well you understand these aACE features: Purchase Orders Discovery Training Quiz
