This guide walks you through how inventory works in aACE. It is intended for new users in the Discovery process.
Introduction
aACE's robust inventory features allow you to effectively manage and track the products you stock. This Discovery training guide will provide you with a basic understanding of how aACE tracks quantity and cost from end to end, how to find this information, and how to adjust inventory quantities.
This guide will not focus on basic steps or knowledge. It presumes you are familiar and comfortable with the foundational topics already covered:
- Discovery Training: Basics
- Discovery Training: Purchase Orders
- Discovery Training: Sales Orders
- Discovery Training: Production
This training guide is meant to supplement the content covered in our Inventory webinar. For additional insight about your aACE system, please also watch the webinar.
Line Item Codes
Line item codes (LICs) are the heart of inventory in aACE. Each line item code in your system can represent a product, intangible item, labor, expenses, or other related items as needed. Transactions in aACE almost always involve some sort of LIC.
There are several types of LICs. For this training guide, you will be focusing on the Inventoried Item and Inventoried Assembly Item (IAI) types. These two LIC types are directly connected to inventory levels and workflows. The key difference between Inventoried Items and IAIs is how the inventory is acquired. Inventoried Items can be bought, while IAIs can be bought or made.
You can view inventoried and inventoried assembly items:
- Navigate from Main Menu > Inventory > Line Item Codes.
- Click the 'Find Inventoried Items' Quick Search link in the module footer.
This displays all inventoried and inventoried assembly items.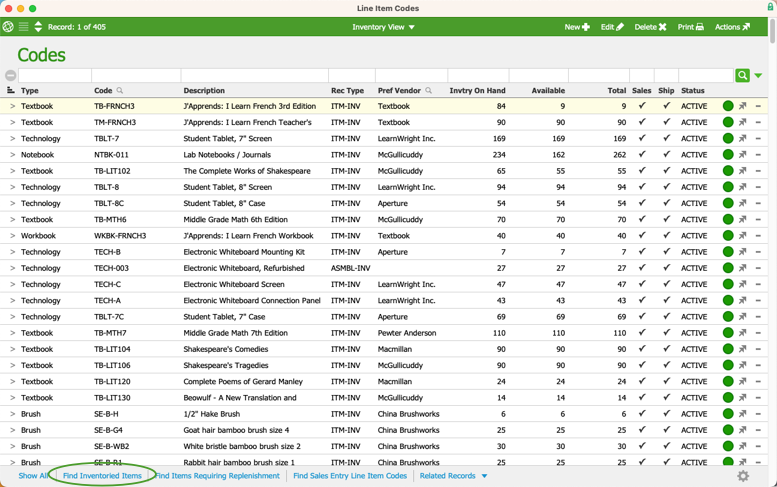
- Click the Rec Type column heading.
aACE sorts the results by LIC record type.


When Inventoried Items and IAIs move throughout your system (e.g. from purchase orders to your inventory or from orders to outgoing shipments), aACE tracks them in the Inventory Transactions module.
Inventory Transactions
The Inventory Transactions module tracks inventory moving through your system. To access this module, navigate from Main Menu > Inventory > Inventory Transactions.

This guide will focus on an example of the transactions from items coming into your system through a purchase order (PO). The following steps will walk you through receiving sample items from a PO record, which will close the PO. Then, you will view how the inventory transactions display in the Inventory Transactions module.
- Navigate from Main Menu > Accts Payable > Purchase Orders.
- Click New in the header bar.
- Search for and select 'Textbook Emporium' in the Vendor selection popup.
- Search for and add 'SW-ENG1' to the PO Items section.
- In the quantity column, change the value to '20'.
- Click Save.
- When prompted, click Open.
Take note of the PO's ID number in the upper left-hand corner. You will use this ID later. - Click Management > Shipping & Receiving > Actions (
 ) > Receive Item.
aACE generates and displays a shipment record to receive the incoming items.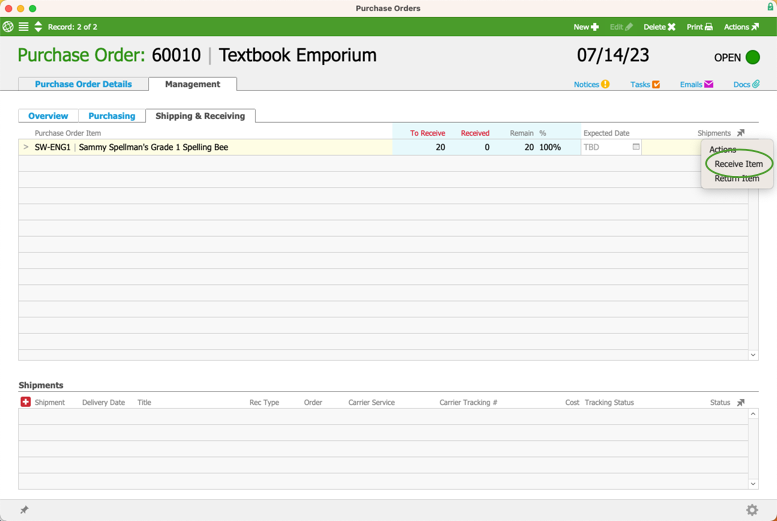
- At the shipment record, click Save > Yes.
- Navigate to the PO record again, then click Purchasing > Actions () > Purchase Item.
aACE generates and displays a purchase for the items. - At the purchase record, enter data in the required fields (i.e. Vender Inv #, Inv Date).
- Click Save > Open.

In order for a PO to close, you must open a related purchase. For this example, receiving the incoming shipment and opening the purchase prompts aACE to auto-close the PO.
Now you will view the inventory transactions for this PO, shipment, and purchase. This shows you the step-by-step history of an LIC's balance. It can be helpful for auditing and troubleshooting.
- Navigate from Main Menu > Inventory > Inventory Transactions.
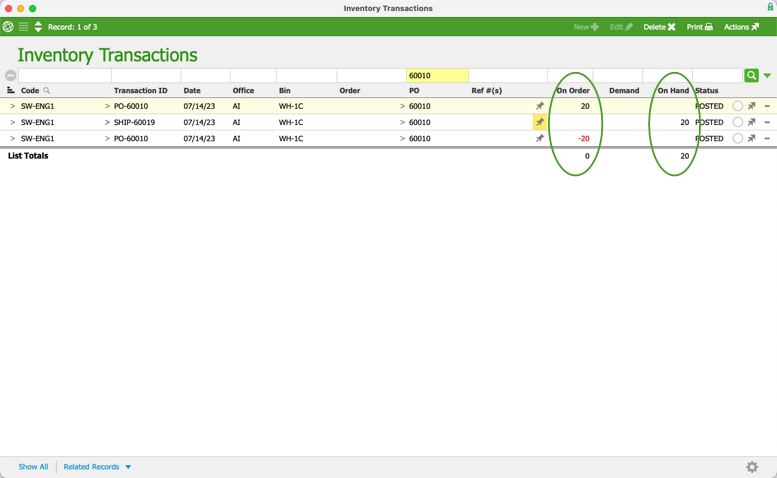
- In the Quick Search bar PO field, search for the ID number of your PO that you noted earlier.
aACE presents three transaction records:- First line — On Order value of 20. This represents the initial value requested on the PO.
- Second line — On Hand value of 20. This means you have received the inventory and these 20 items are now in your facilities.
- Third line — On Order value of -20. This means the purchase for this inventory is closed. The product is no longer considered 'on order'.
- You can verify these details by clicking the footer link Related Records > Purchase Orders.
aACE displays the Purchase Orders module showing the PO you created earlier. The Status is now Closed.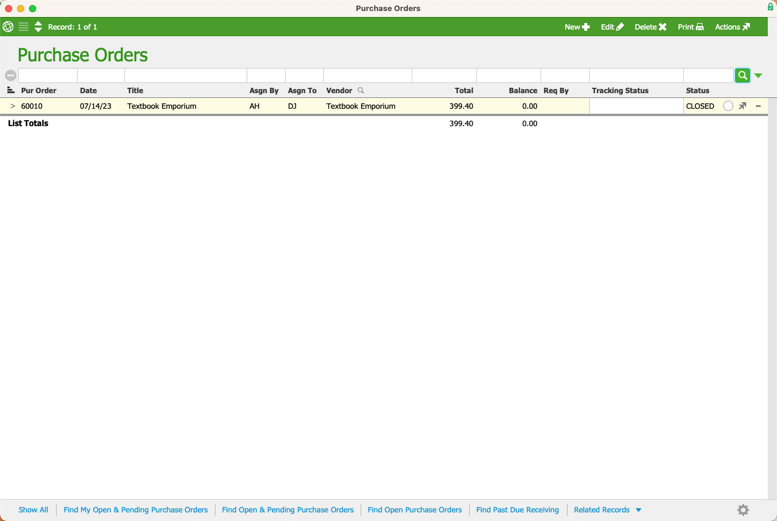 Note: The Related Records links help you quickly find specific records connected to various transactions.
 Note: The Related Records links help you quickly find specific records connected to various transactions.
Offices and Inventory Bins
aACE defines an office as an office location, warehouse, or another separate company. Within offices, inventory bins are physical inventory storage locations. You can view the inventory bins created for the sample data by navigating from Main Menu > Internal > Offices > aACME Education Solutions, Inc. > Inventory Bins tab.

You can mark flags to classify bins in each office as default, non-net, clearing, or transit bins:
- Default — aACE automatically suggests this bin as the receiving location for incoming shipments.
Note: If you have specified a different default bin directly on an LIC record, that setting overrides this office default. - Non-Net — Collection point for items that cannot be sold (i.e. damaged inventory). Items moved into these bins do not have an inventory value in aACE.
- Clearing — Used for initial inventory returns from customers before the inventory is sorted back out into the long-term storage bin.
- Transit — Used for tracking items that are being transferred from one location to another.
Default Bins
When you set a default inventory bin, you are instructing aACE to automatically apply that bin on relevant records such as shipments. This means you do not have to choose an inventory bin each time you receive incoming product.
You can set default bins for:
- An entire office — Designate this bin on the office record.
- Individual products within an office — Designate these bins on each LIC's Inventory Management tab. You can also specify a default return bin.
After aACE autofills a default bin, team members can manually change it as needed.
Bin Types
Along with entering a Bin Name and Abbreviation, you can specify a Type for each bin:
- Bin / Shelf — Inventory replenished with the parent office
- Other Types (e.g. Truck) — You can type new values into this field to best support your business needs. Note: aACE considers any other bin Types as independently managed for inventory replenishment (see below).
Independently Managed Bins
When you enter a bin Type other than "bin" or "shelf", aACE identifies that bin as independently managed. These bins have product replenished separately from the parent office inventory levels. For example, a supply truck could have its own inventory replenishment to ensure it stays stocked.
When you create an independently managed bin, aACE displays a confirmation message reminding you of the relevant distinctions. It also activates the Replenishment Ship-To Location (Company) field for that bin.

The company location you select here becomes the bin's Ship-To address for inventory replenishment, transfer adjustments, and purchase orders. This lets you ship product directly to the bin's location, instead of being delayed at a middle-point.
Note: You must create the company record before assigning it as the bin's ship-to location. You can create a new company from the Companies selector or from the Companies module.
Inventory Setup for Line Item Codes
You can make additional inventory configurations directly on your LIC records. These settings help accommodate the type of inventory your business handles. Navigate to the Line Item Codes module, then access the detail view of an item and click the Inventory Management tab. In the Inventory Setup section, you can mark flags to note specifications on that product:
- Track by Mfr Lot — Products that have many units with the same ID. Tracking with manufacturer lot numbers increases traceability for batches of inventory. You can track manufacturer lots by viewing the Inventory Lots or Inventory Usage modules.
- Serialized — Products that have a unique ID for each unit. Tracking with serials increases traceability for individual and unique items. You can track serial numbers by viewing the Inventory Lots or Inventory Usage modules.
- Discontinue — When inventory for a discontinued LIC runs out, aACE will not replenish the inventory.
- Special Order or Drop Ship defaults — Identifies items that typically are not replenished when sold.
- Perishable — For items with an expiration date.
The Cycle field specifies which cycle count you want an inventoried item to be included in. The Cycle field's drop-down list defaults to quarters of the year, but you can enter the names of cycles that work best for your company. These can be months, letters, departments, etc.
Inventory-Focused Modules
The Inventory Adjustments, Inventory Lots, and Inventory Usage modules are especially valuable when you audit inventory or otherwise need to track the flow of product through your system.
Inventory Adjustments
Any time your inventory quantities change, aACE tracks the update in the Inventory Adjustments module. The Inventory Adjustments module helps you modify the quantity of inventory on hand, as well as the value on the books. You can access the Inventory Adjustments module by navigating from Main Menu > Inventory > Inventory Adjustments.

aACE supports various types of inventory adjustments to help streamline your inventory management. Each type applies particular calculations and effects in your system:
- Count — Updates inventory quantities based on inventory counts.
The inventory balance in the adjustment items portal is derived based on the date at the top of the adjustment. Going to the related inventory transactions will show how and when aACE created a transaction to adjust inventory balances. - Loss — Updates inventory quantities based on inventory losses.
Typically, losses are used when something gets broken in-house. Loss adjustments do not affect timing for Last Count dates. - Transfer — Moves inventory from one bin or office to another.
Inventory transactions will show aACE decrementing the quantity from one bin and adding it to another. - Assembly — One way to create assembly items in the system.
An example of this is if you're building made-to-stock product (as explained in the Production training guide). You are combining items to create new inventory, so aACE creates an adjustment for that. - Division — Used when splitting product.
For example, suppose you're cutting material. You enter the original size on one line of the adjustment, then also enter the new sizes on subsequent lines. aACE adjusts the inventory accordingly. - Beg Bal — Starting inventory numbers when you go live.
To practice using an inventory adjustment, suppose a team member accidentally drops a student tablet in the warehouse, damaging the product. To adjust for this inventory loss, you must create a Loss inventory adjustment:
- Navigate from Main Menu > Inventory > Inventory Adjustments.
- Click New > Loss.
- In the adjustment's Title field, type 'Broken Tablet Screen'.
In other circumstances, name the adjustment according to the situation.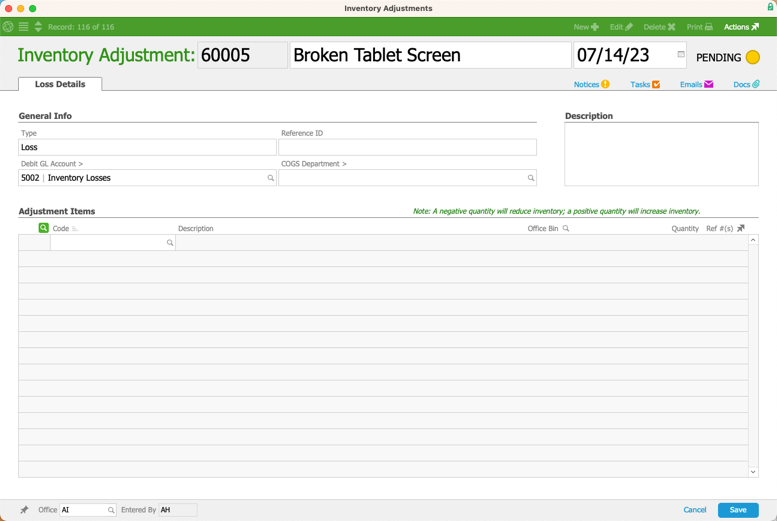
- In the Adjustment Items section, search for and add 'TBLT-7'.
- In the Quantity field, enter the value as '-1'.
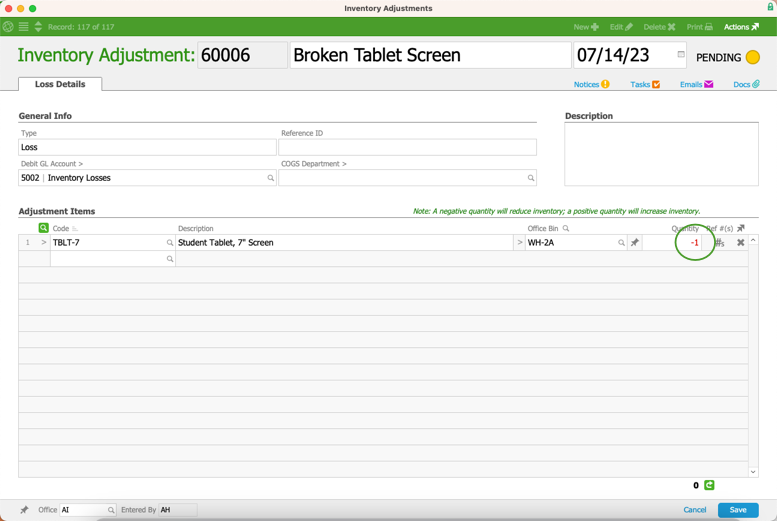 Note: Because this type of adjustment itself refers to a reduction in inventory quantities, aACE users sometimes think the quantity should be entered as a positive value. However, for a Loss adjustment, you still use a negative number to note reduced inventory. This is also noted on the screen as a reminder.
 - Click Save.
- When prompted, click Post.

 Note: Because this type of adjustment itself refers to a reduction in inventory quantities, aACE users sometimes think the quantity should be entered as a positive value. However, for a Loss adjustment, you still use a negative number to note reduced inventory. This is also noted on the screen as a reminder.
Inventory Lots
aACE's Inventory Lots module allows you to view the "true cost" of items. True costs use the real value of your inventory, calculated from the unit cost on the purchase record, the shipping costs, and other factors. Because of the complexity involved, many other software packages simply use an estimated cost.
This module is important to the cost of goods sold (COGS) reconciliation process. This process cross-references inventory usage and inventory lot records. It helps allocate your inventory value based on the cost method you specify (e.g. LIFO, FIFO, or unit-specific logic). COGS is an advanced inventory allocation process. It will be discussed in more detail later in your Discovery process.
If you're interested in reading more about inventory lots, check out our inventory lots help guide.

Inventory Usage
aACE's Inventory Usage module shows inventory usage discrepancies and accrued COGS. Alongside Inventory Lots, the Inventory Usage module enables COGS processes (as noted above).
Navigate from Main Menu > Inventory > Inventory Usage to access this module. You can read our inventory usage guide for more information.

Test Your Understanding
After working through the tasks in this training guide, use this online exam to see how well you understand these aACE features: Inventory Discovery Training Quiz
